Night Flight: For Dummies
Having seen the previous guides by Snake and ipoon.be, I wanted in on the act. So here is my guide for the map Night Flight.
1) Introduction
Night Flight, as you can probably tell from the name, is a night map, the 3rd one in Special Forces, along with Devils Perch and Leviathan. It is the second SAS v Insurgents map after Warlord, and is contested around an abandoned civilian airport in Syria. Due to it being a Night Map, and that many get their SAS and Insurgent Medals and Ribbons from Warlord, it can be a very unpopular map. If you see a server quickly hop in and count yourself lucky. There are usually 1 or 2 at peak times, e.g. evenings and weekends. It is quite a good map to use as a server starter, I have found, especially if there are no other populated servers running it.
The map is one of the few that work well on Infantry Only, but it is still much better with vehicles and gives a fairer game. This guide will focus on the vehicle format; many of the tactics can still be used in IO.
All SF goodies (Zipline, Grappling Hook, Tear gas) are used in this map
2) Storyline
The Insurgents are trying to bring the airport back on line, presumably to hamper the British and Americans in the Middle East. The SAS have been sent in to clear out the threat, before the Insurgents have the airport fully operational.
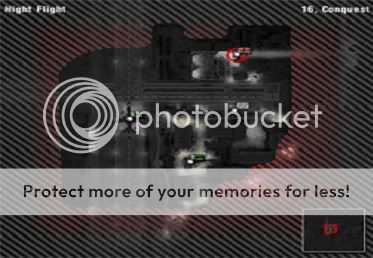
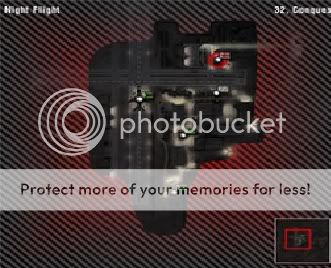
Map Layout:
16p
32p
64P
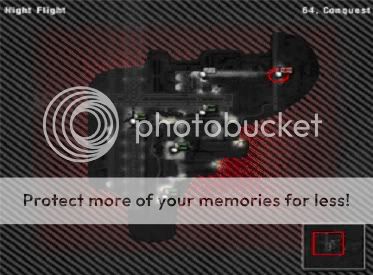
There isn’t a large amount of difference between the 3 maps, an extra flag added on each size, and the 64player map can easily be played well with 32 players. Another difference that cannot be seen on the maps is that the SAS uncapable (Helipad) is PARACHUTE SPAWN at the 16-player size, but not at 32. In other words, the map isn’t hard to learn and once you have learnt one size, the others are not hard to adjust too. If you don’t like hills this is the map for you, as when did you last see a sloping airport?
This guide will focus on the 64 player map which is the one most commonly played.
3) Settings
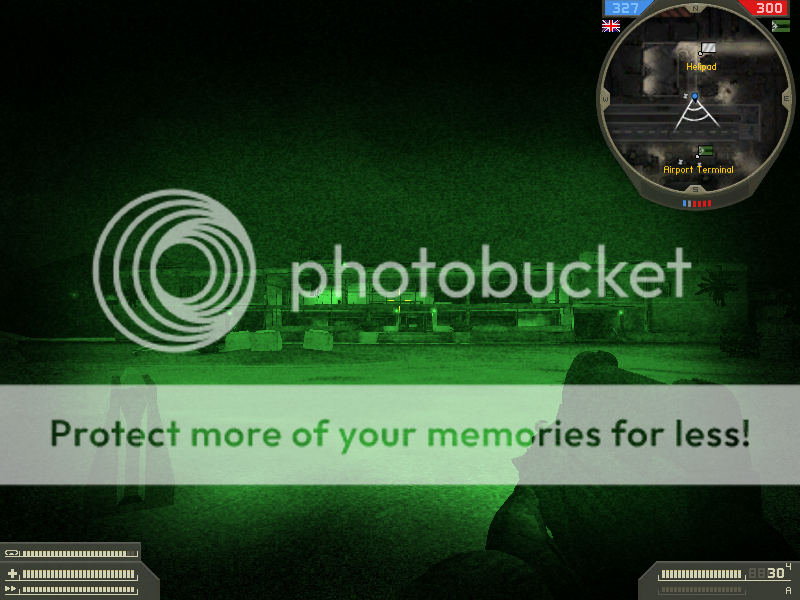
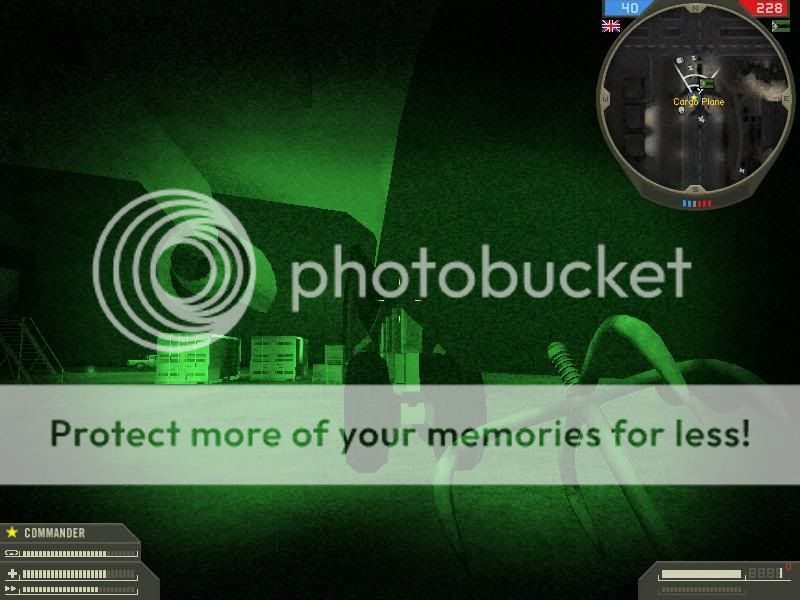
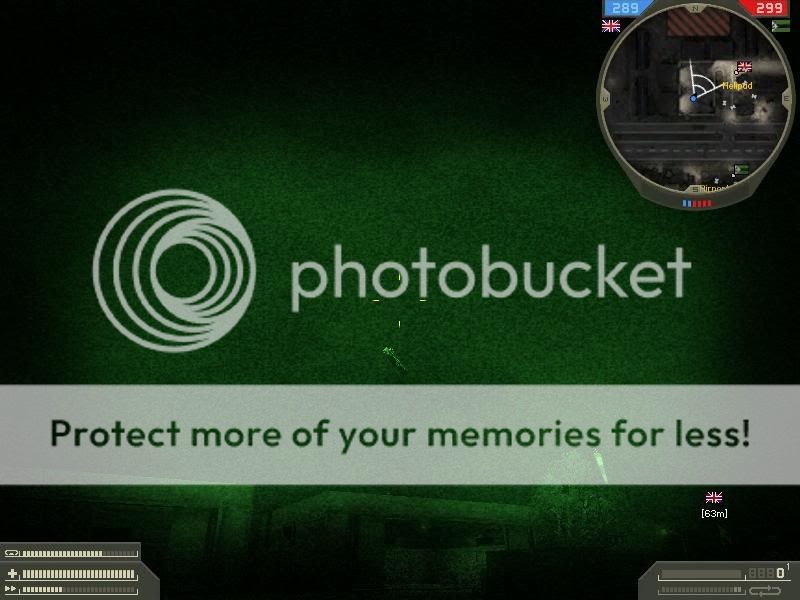
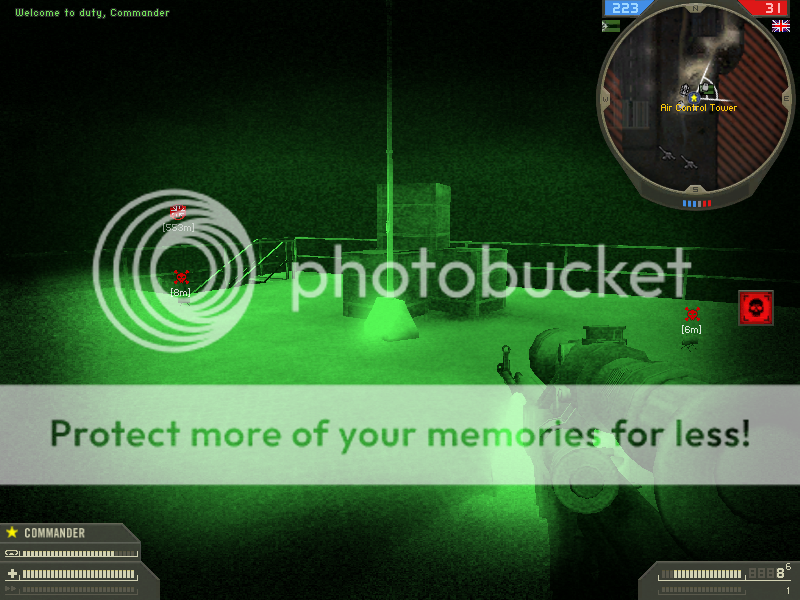
It takes a while for most people to adjust to using Night vision (#7), and what settings you prefer. I suggest playing singleplayer for a bit if you are worried about stats, just to get used to Green. Here are some screenshots if you are too lazy to try it out for yourself
Low Graphics
Medium Graphics
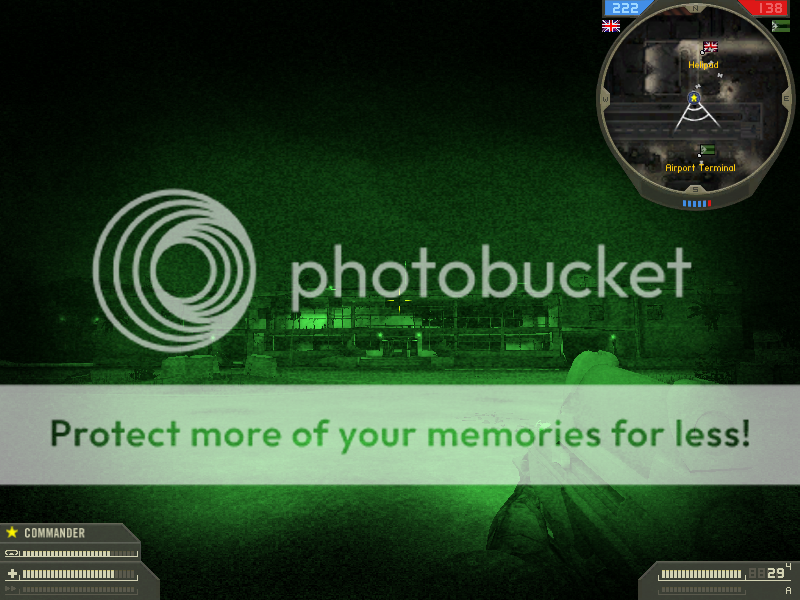
High Graphics
Little difference for me with night vision on, I usually have mine on Medium, just because it always has been and I don’t want to go through all that optimizing shaders. Night maps make a good level playing field.
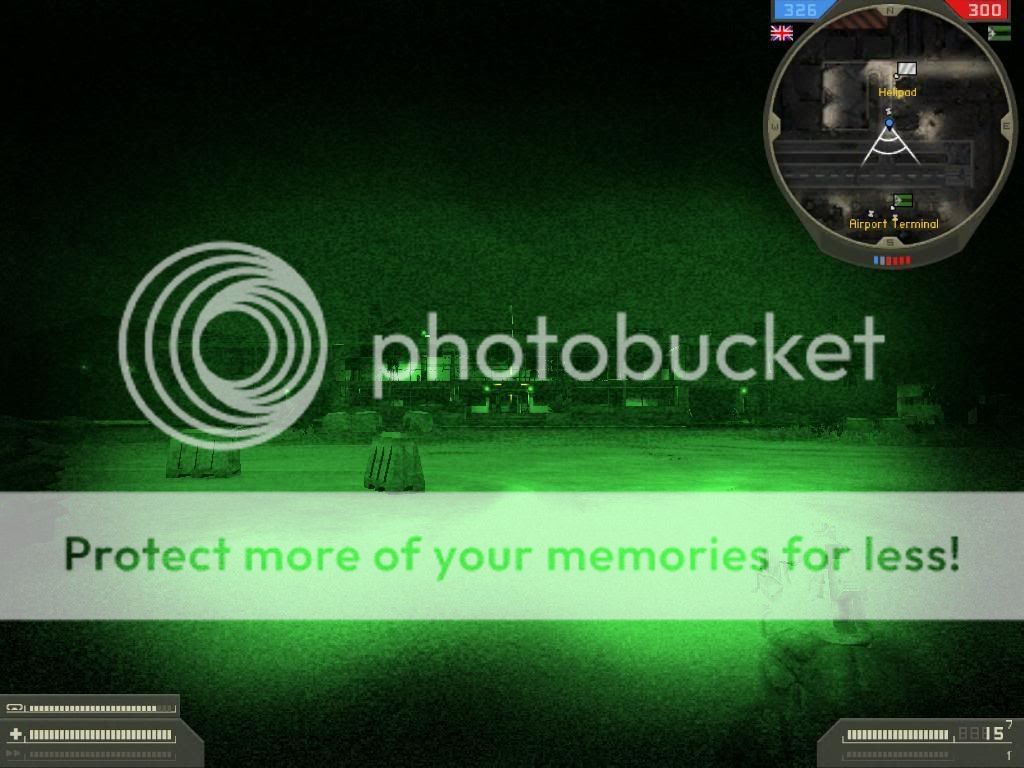
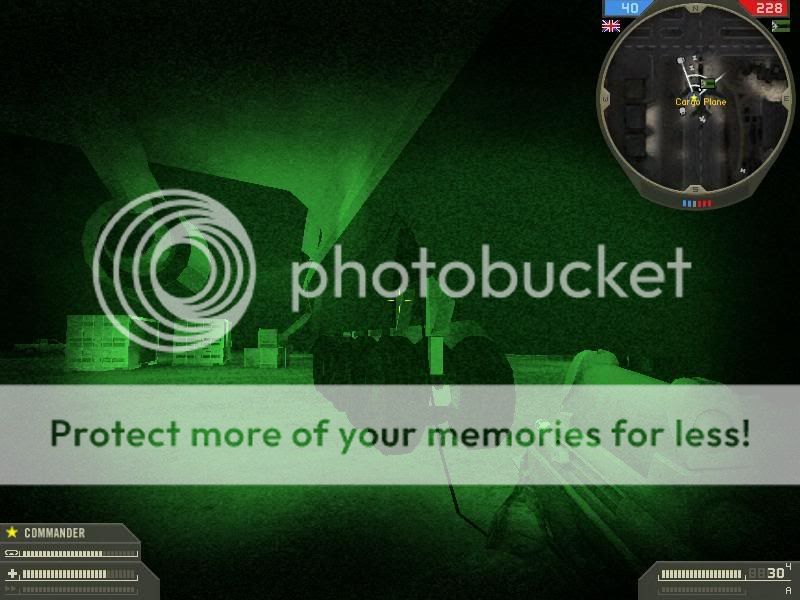
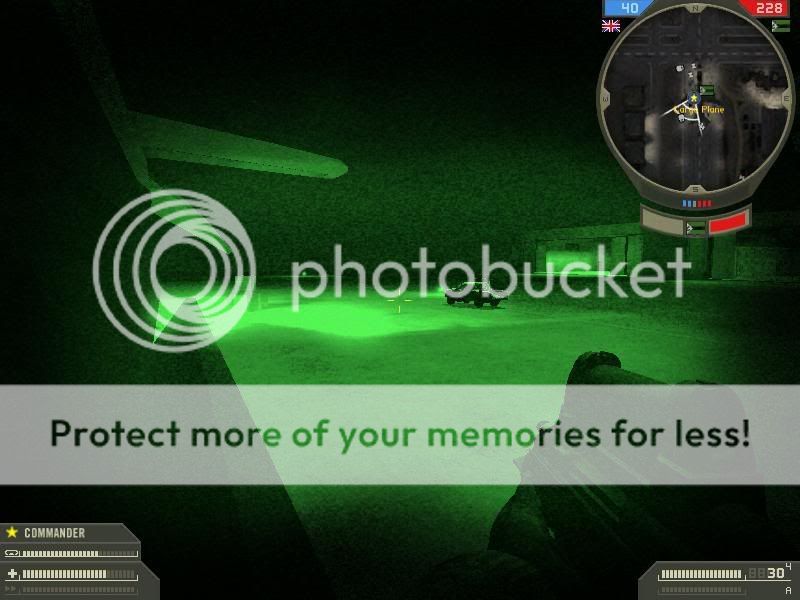
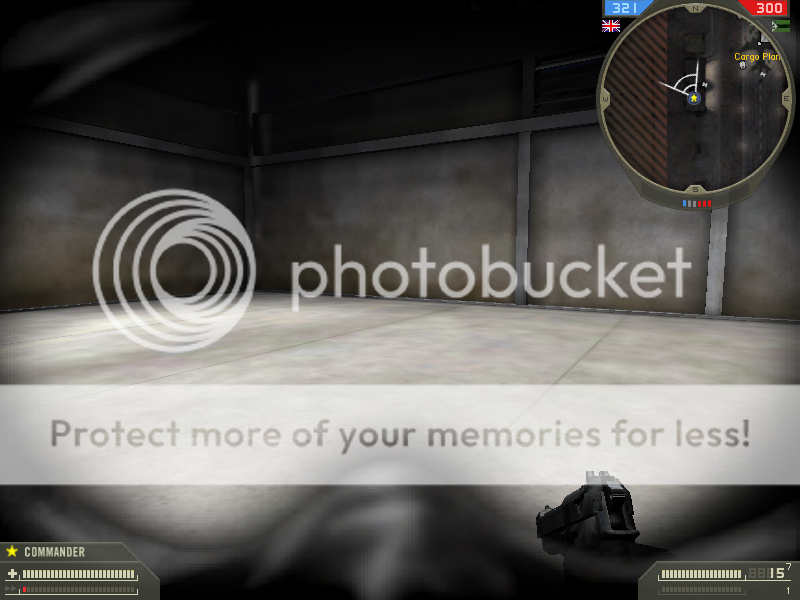
With Night vision off however
High Graphics
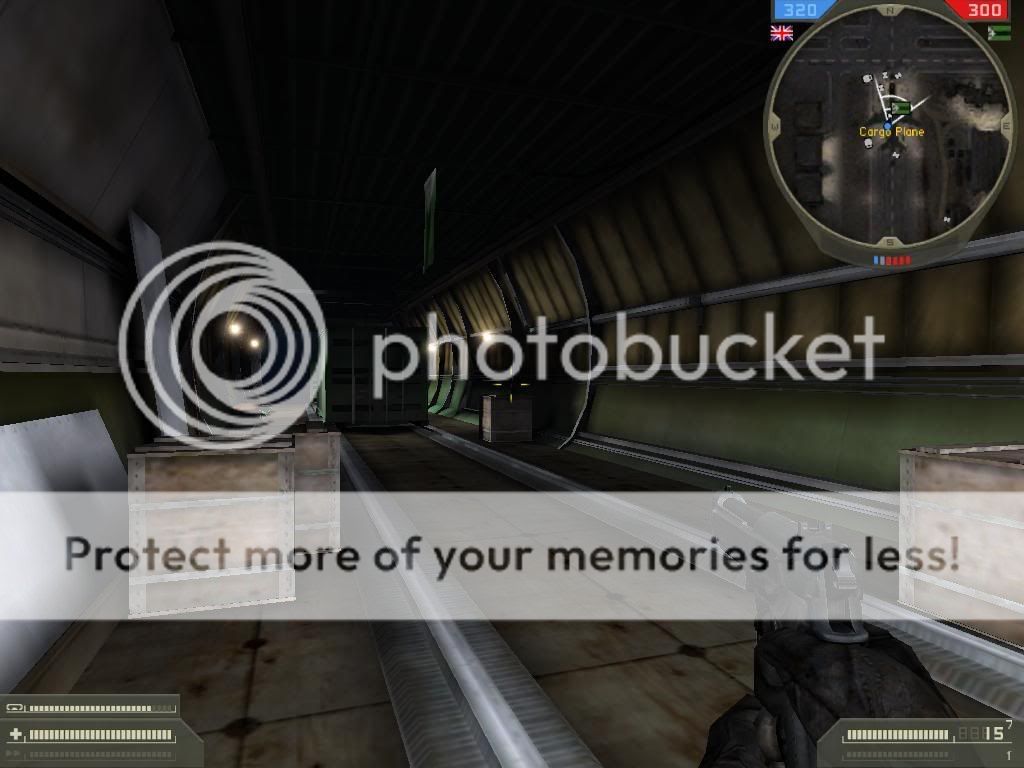
Medium Graphics
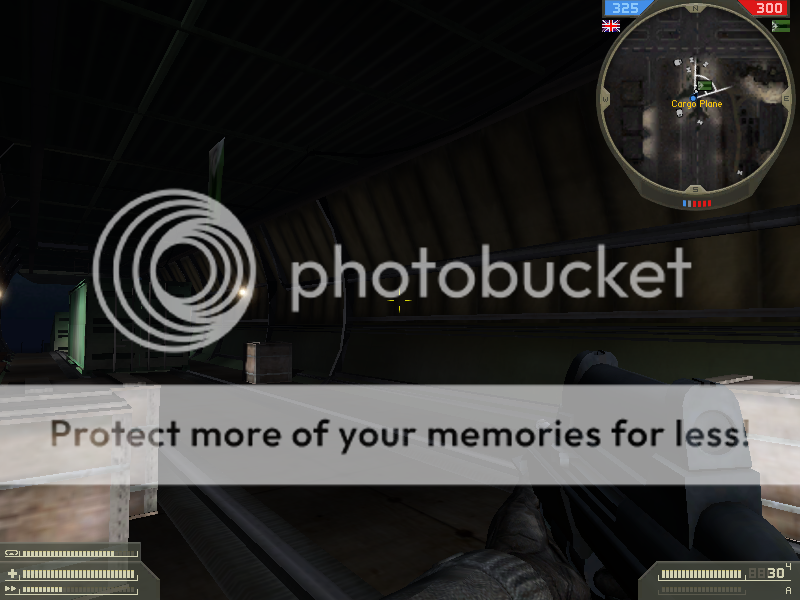
Low Graphics

All three taken from pretty much the same spot in the cargo plane, as would be expected, high graphics have the advantage. The difference is not as large as the screenshots show and anyway, night vision is needed in most places, so a good graphics card is worth little here.
Credit to JaggedPanther:
INCREASE YOUR GAMMA ON YOUR VIDEO CARD SETTINGS AND SAVE THE SCHEME AS BF2 NIGHT:
Therefore you won't need night vision goggles.
(^^Some people will do anything for points - Cheppi)
4) Flags and their vehicles
Because no one likes having to run, it’s important you know what vehicles are at each spawn point.
4.1) Airport Entrance (SAS Uncapable)
Main Spawn Second Spawn (Slightly nearer Helipad)
1x Humvee with Tow 2x Quadbike
1x AIL Raider
1x Quadbike (ATV)
1x UAV
1x Scan
2x Artillery
4.2) Helipad (Neutral) Same Equipment for both teams
4x Quadbike
4.3) Airport Terminal (Insurgent capable) Same Equipment for both teams
2x Quadbike
1x Forklift
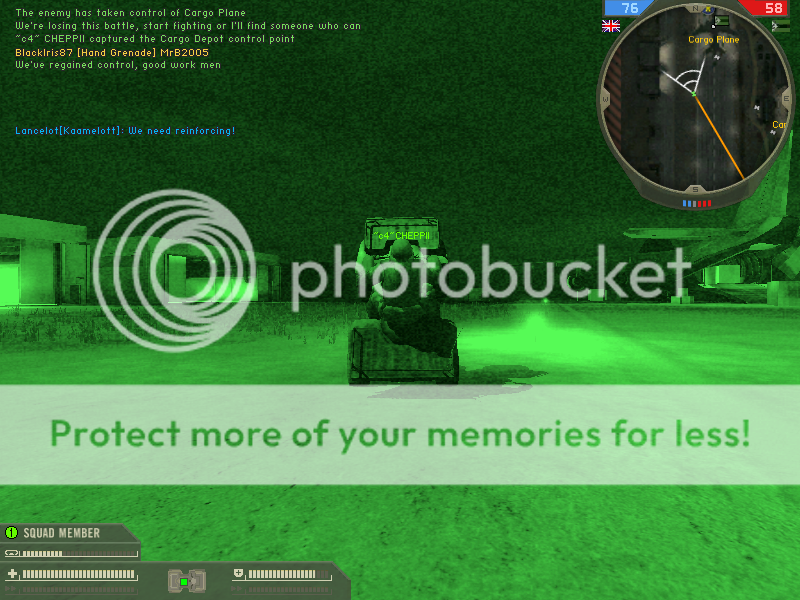
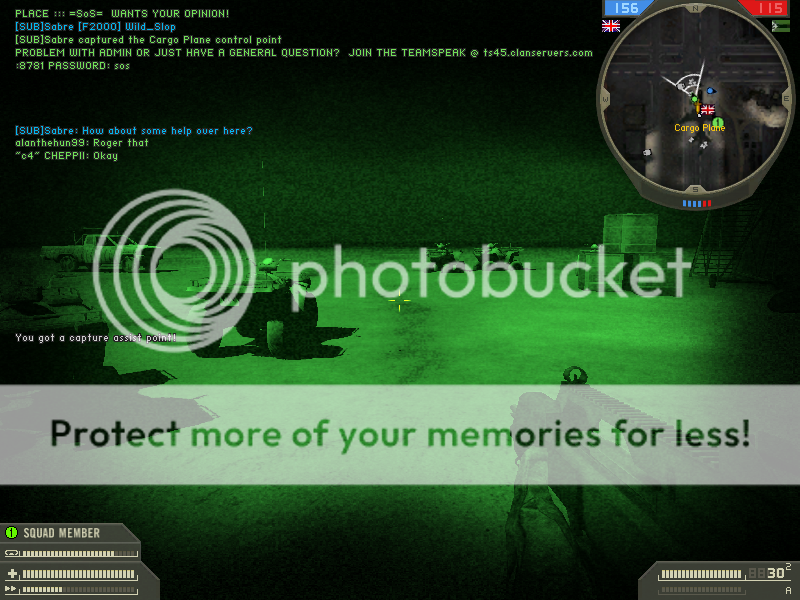
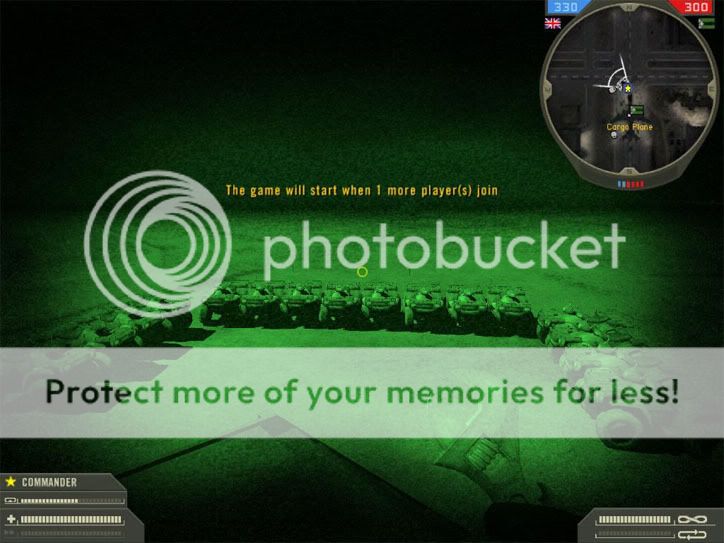
4.4) Cargo Plane (Insurgent capable) Same equipment for both teams
3x Quadbike
2x Civilian car
4.5) Cargo Depot (Insurgent capable) Same Equipment for both teams
4x Quadbike
4.6) Airport Control Tower (Insurgent capable)
Insurgents: SAS:
1x BMP2 1x Humvee
2x Civilian Car 2x AIL Raider
2x Quadbike 2x Quadbike
1x UAV
1x Scan
2x Artillery
That’s a total of 25 transport vehicles and no less than 18 Quadbikes!
I tried to line up all 18 Quadbikes…
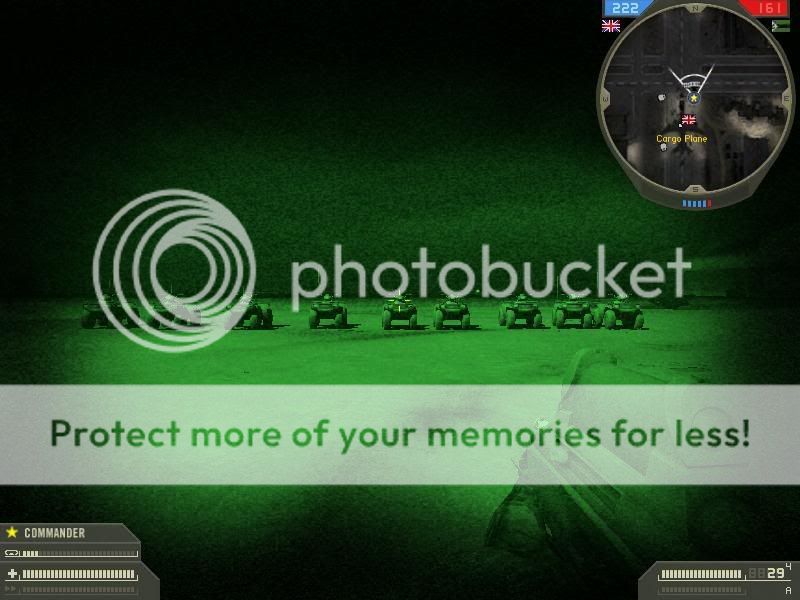
I managed to reach 9 before, one decided it had had enough and started a domino effect .
Still, I am claiming the world record for the most Quadbikes in a screenshot.
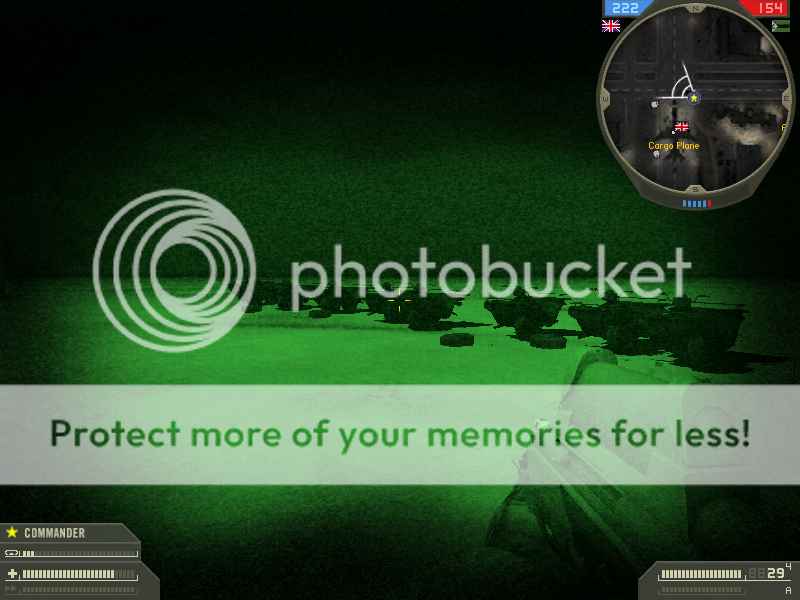
PM me with a screenshot if you can get more and take my crown as “World champion of most Quadbikes in a screenshot on Night Flight” J
Now lets get to the proper stuff, Fighting!
5.1) SAS Campaign
Firstly become a squad leader and invite trustworthy players to your squad. 4 should be enough.
Your best bet is to spawn at the back spawn point, and try and grab the Hummer or the AIL Raider for your squad, the three Quadbikes go very quickly meaning you will probably have to run.
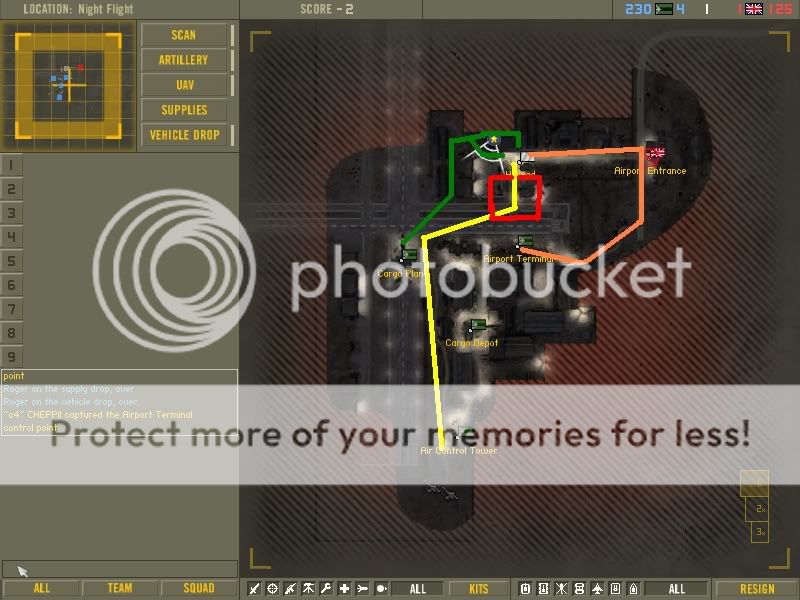
The three main routes that are used are the Red, Yellow and Dark Blue, The light Blue and orange, are sub-routes of the Dark Blue and Yellow routes respectively.
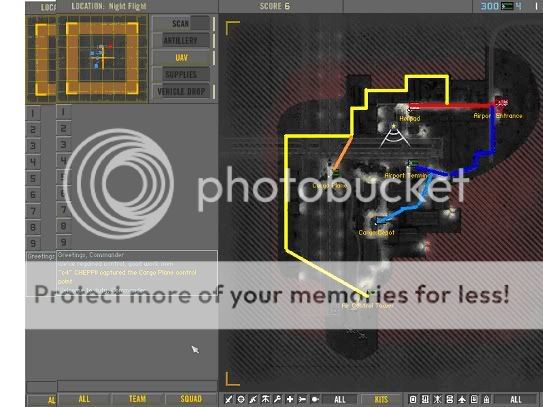
Of course this is BF2, so 90% of players will run blindly down the red route, which is ok, as you need the helipad to avoid being pegged in your uncap, however this then leads to being held down at Helipad.
If you can get a full Humvee or The AIL Raider, take the blue route and surprise the insurgents by grappling up the back of the Terminal, If you are on your own or with only 1 other player, capping Cargo Depot is a better option, as it will almost certainly have very little defence.
Should you somehow get one of the 3 Quad bikes, then definitely take the yellow route and cap the Control tower, Now the insurgents are trapped from the North and South, with no UAV, Scan or artillery if you or a teamate blows it up (and you definitely should) and the BMP2 will no longer spawn.
Now the ticket bleed has been stopped, its time to squeeze those insurgents. The main battle will still be raging between Helipad and Airport Terminal, but this will, be gradually getting smaller, as the insurgents realise they are getting stuck in a corner. As they move to try and recapture Airport Control Tower, The sheep (Those predictable players that do the same thing round after round) as I like to call them can move in and take the terminal. Meanwhile yourself and a few trusted followers can mover in on the Cargo Plane, or the Cargo Depot. I recommend the plane, as it is easier to keep the insurgents hemmed in at the Depot. However by leaving Air control tower you will likely lose it, so you should way up the pros and cons of your next move. I would suggest attacking cargo plane, as although you will allow the insurgents their assets back, you can trap them in the southern corner.

It is advisable to keep your squad together and take one of the two cargo flags, if you split up, your likely end up with nothing.
Now you have the insurgents where you want them, the ticket bleed is going, and if you really want to you can just sit back and defend, letting it count down. The insurgents will eventually break through though, so its best to try and finish them off.
The majority will be spawning at the depot as it is nearest the action, and using to Quadbikes to try and break free. To stop a few escaping you need to surround the depot. Get a sniper to lay a few clays at the plane incase of anyone coming up from the Control Tower. Try and co-ordinate your attack so you all move in at the same time.
From then on its just one big battle, with all the insurgents at the control tower it will be very difficult to cap. As long as you can keep them pegged in you will win. If you really want the dramatic victory, sneak round the side or back and grapple on to the top.
5.2) Insurgent Campaign
Once again, join, or better create, your own squad, you’re not playing singleplayer now!
First off you have to realise that the map is made to allow the SAS the Helipad, and no matter what you try they will get there before you and in larger numbers. Rather than go all out down the obvious route (Straight line from the Airport Terminal to the Helipad) use back ways.
Once again 90% will go the obvious way, this is good for you though as it keeps the SAS trapped for long enough for you to spring your counter attack.
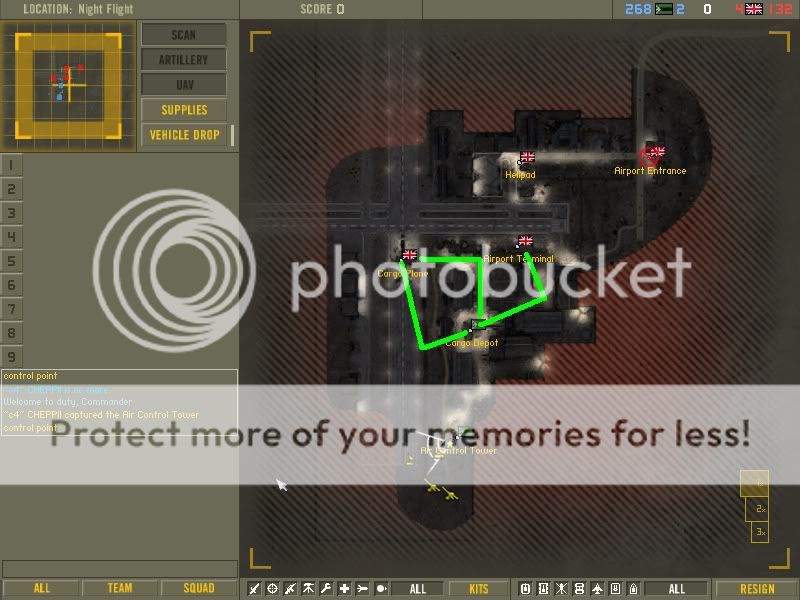
The green route is the quickest, as it involves using the Quadbikes at the Cargo plane. A Civilian Car is also handed for added fire power It is similar to the yellow route for the SAS, so you can also stop any SAS who are trying a breakout. Most of the SAS will be around the construction building in the red area. From the back you can quickly assault the flag and then in a classic pincer movement, crush the remaining ones in the red area with the help of the sheep at the Terminal. Once these are removed take up defensive positions up on top of the hanger and in the construction site.
The Orange route is slower, as it involves walking on foot to the SAS uncap, also check the server rules to see if they allow uncap attacking. Once here you can destroy the commanders assests and then take any available vehicle any move on to Helipad.
The yellow route is for the BMP2, yes I know its crap but what have the SAS got that is any better? With this added firepower and 4 crew members you can simply just drive up to the flag, get them all out and within 10 seconds the flag will be yours. If you see the Humvee, destroy it straight away, as it is the only defence, apart from handheld weaponry, that can take you down.
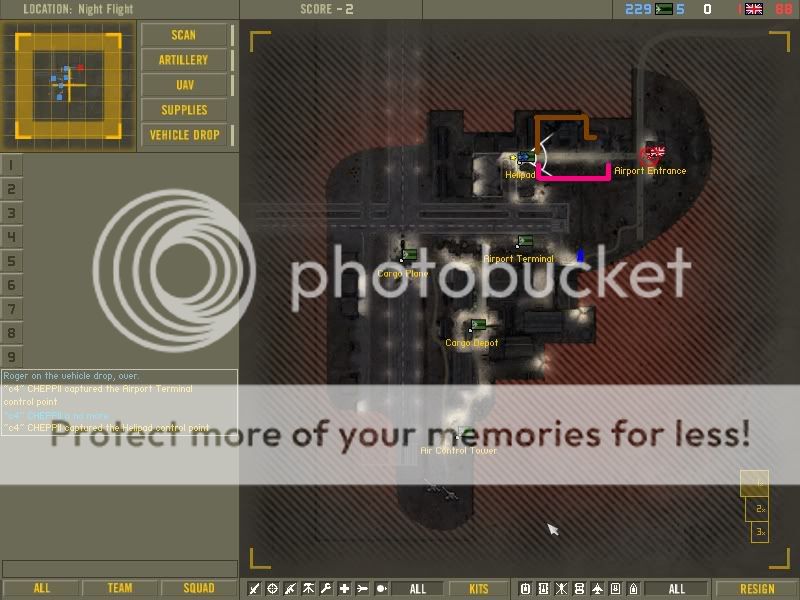
Now you have the SAS stuck in the Uncap losing tickets fast. Keep the BMP2 guarding the main road for transport vehicles and top of the range sheep (The ones that will keep jumping over the top of the building pressing p) As long as server rules allow it, infantry groups can use the Pink and Brown routes to spawn rape the SAS. You must still be wary of a break out through the gap in the fence (the blue bit) as the last thing you want is to see the Air Control Tower flag to turn Red, White and Blue while you are all spawn raping.
If you keep these routes covered there is little the SAS can do and it will be a quick and easy win for the Insurgents.
6) Flag secrets
Ok so these aren’t really that secret, but I suspect there is a few people don’t know about. I won’t do Airport Entrance as if you are there you are either in a crap team or spawn raping.
6.1) Helipad
Flag Overview: Nearest flag to SAS uncap. Nearest Insurgent flag is Airport Terminal. Starts at Neutral on 64p (Uncap at both 32 and 16) It can also be capped by vehicles.
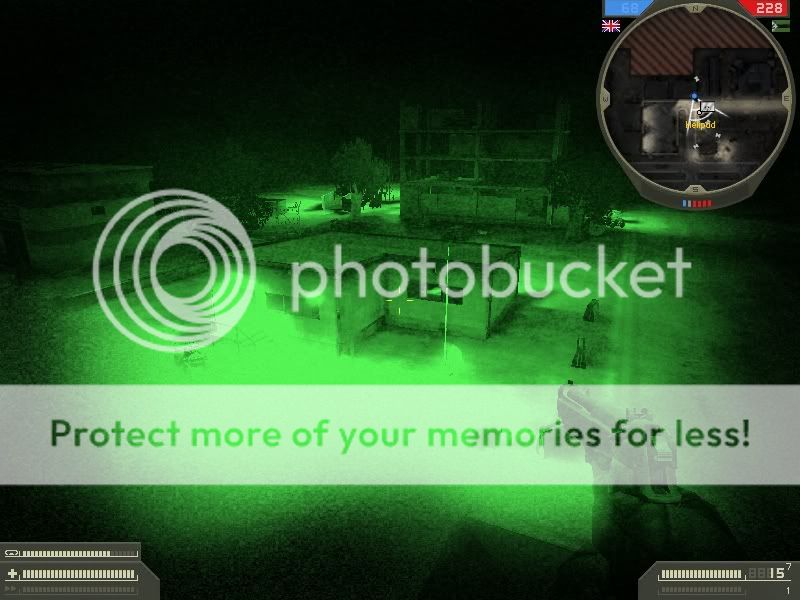
Quite a lot of bright lighting which makes the helipad is a very difficult flag to take, as in it is better to have Night vision off when looking in certain directions (especially the hanger) Added to that there is a small flag radius, it is easy for any enemy to know where you are.
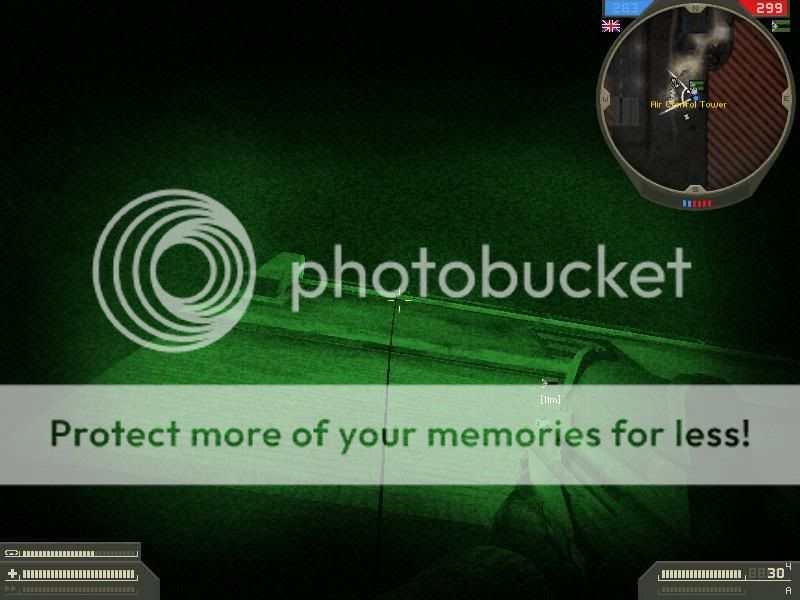
There are two places inside the building that are just inside the radius, one well known, and the other not so. They are shown on the screenshot below.
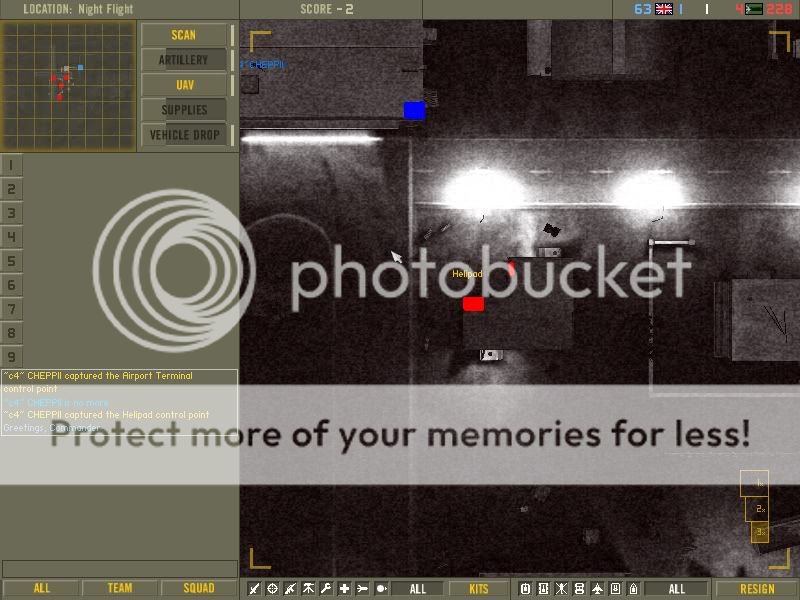
The two red areas are where the flag can be capped from inside the building. The smaller one is behind a table on some chairs, and is quite hard to get too. Thanks to Dice and their coding, you can see legs poking through the wall of the larger area, of which I have knifed many times. J
The blue area is where the first the top screenshot is taken from. And is a very good area to guard the flag.
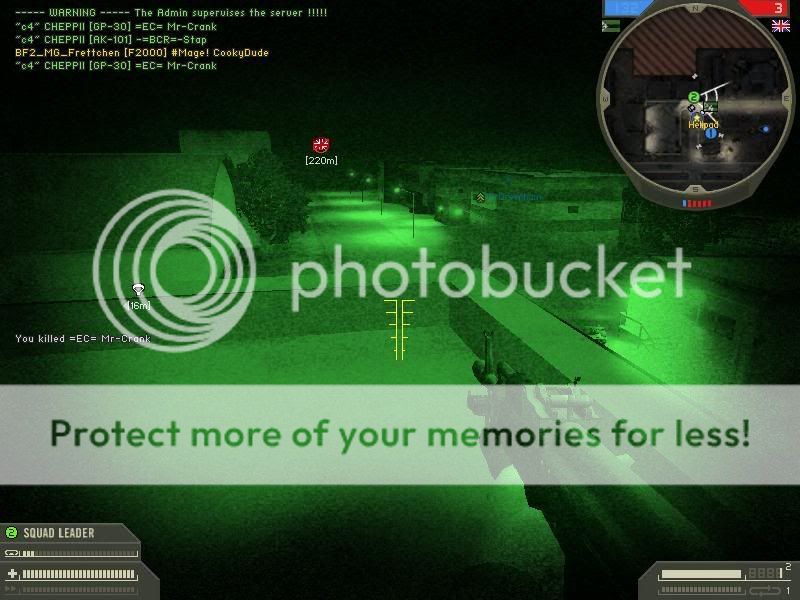
Who doesn’t love grenade launchers
You can also grapple or Zipline onto the building right next to the flag for a surprise attack. You cannot capture the flag from up there though.
6.2) Airport Terminal
Flag Overview: Nearest Flag to Helipad and is where the majority of Insurgents will spawn. The roof is popular with snipers.
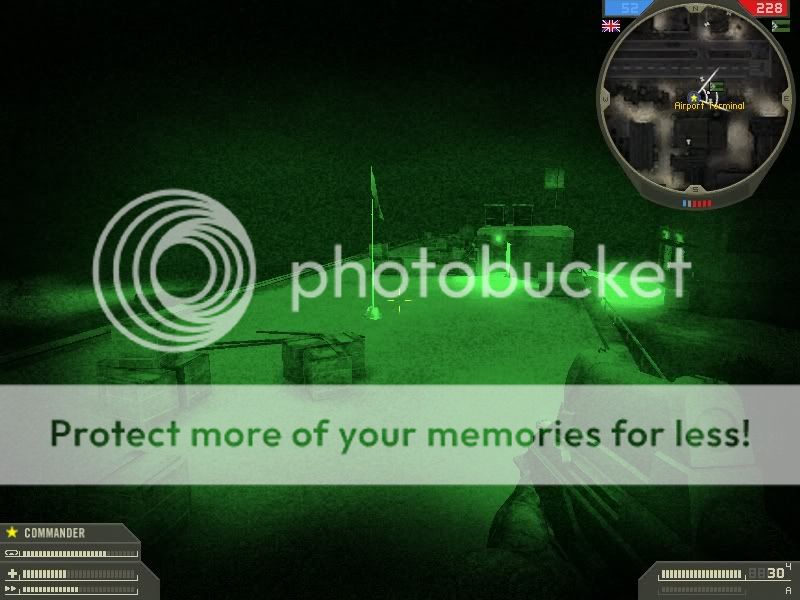
Easier lighting but still a very small radius makes capping the flag difficult. Most of the sheep will use the one and only stairwell to reach the flag, but if there is likely to be snipers on the roof there is also likely to be a nice claymore there waiting. A better bet is to grapple up knife the snipers and avoid their toys. If you don’t have a grapple and can’t find anyone else’s then the ladder behind the stairwell is a good choice.
Credit to Snake: Keep an eye on the UAV. Learn when people are using the stairs and lob flashbangs down it. They ruin peoples vision anyway, let alone with NV on. That'll hold them back a bit, and pop a nade or two down there as well to really keep them on their toes.
The Yellow area is where most snipers will be found, straining their eyes trying to see Helipad. The Stairwell is show as the red area, with the ladder shown I green behind it. A good camping hideout is on top of the stairs as you can shoot any sheep running from the stairs before they know what’s hits them, and allows you to keep an eye on the ladder. The blue area is where the screenshot was taken. Hide there if you wish to die as you are in plane view of the stairwell and people coming up the ladder.
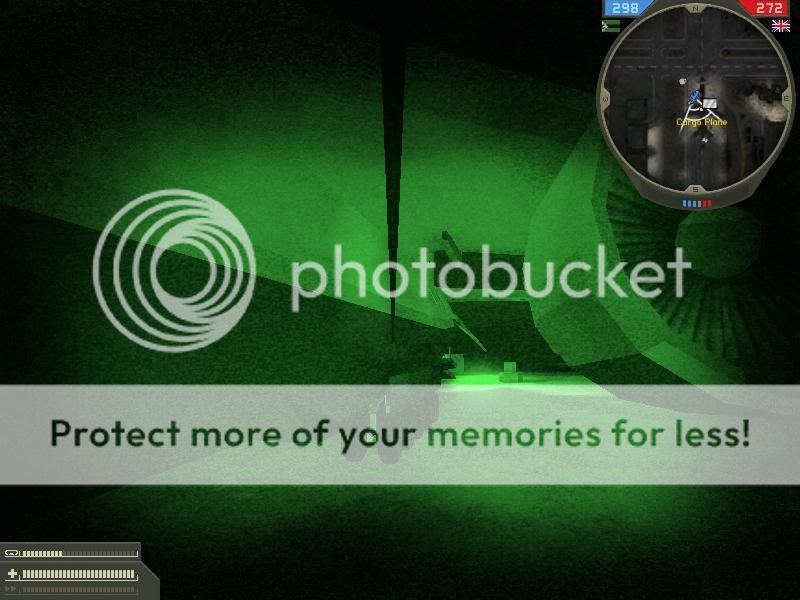
6.3) Cargo Plane
Flag Overview: A very original flag (how often do you say that in BF2) and the maps focal point. The flag is in the middle of the cargo plane that landed at the airfield the previous night. The Area around the plane is very open; meaning running to the plane on foot is a bad idea. However once there, there is a multitude of boxes and crates to hide behind. Many sheep like to show off their driving abilities by driving a Quadbike inside the plane. There is no real need to do this and does not lead to a quick getaway after flag capture, as it slows the sheep down as they crash into crates and boxes.
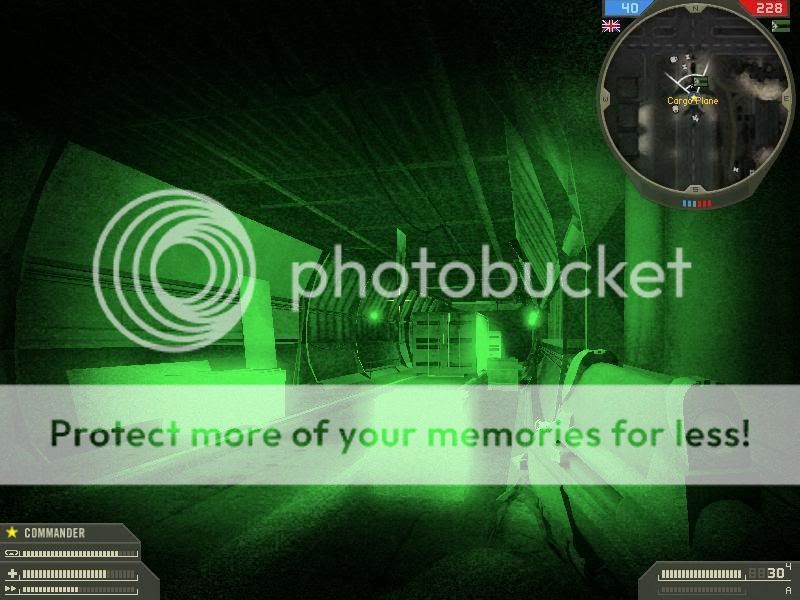
The lighting in the plane is reasonable with both Night Vision on and off, I tend to have it on but, it is mainly player preference. The plane can only be entered by using the two ramps, one at each end (There is an open door you can jump in, but that is very close to a ramp so I don’t consider it to be a main entrance.) Most people think the flag can only be capture in the Cargo bay, as it cannot be captured from both above or below. But I have found another unknown way that is not even in the plane. It is easier to explain in pictures so divert your eyes downwards.
See the flap above the wheels? Well that’s what we are going to grapple onto, This can also be done with a Zipline, but the Grapple is the much easier route
Up goes the grapple
Ta dam, this can be done on both sets of wheels on either side.
Another way is to park a Quadbike by the flap, jump on the bike and then onto the flap. (I always find the easist ways last)
The flag and its radius are shown in their rough positions, with the two ramps shown in green and the side door by the North ramp in Light blue. The original screenshot was taken in the dark blue section. The sets of wheels are right on the edge of the yellow section.
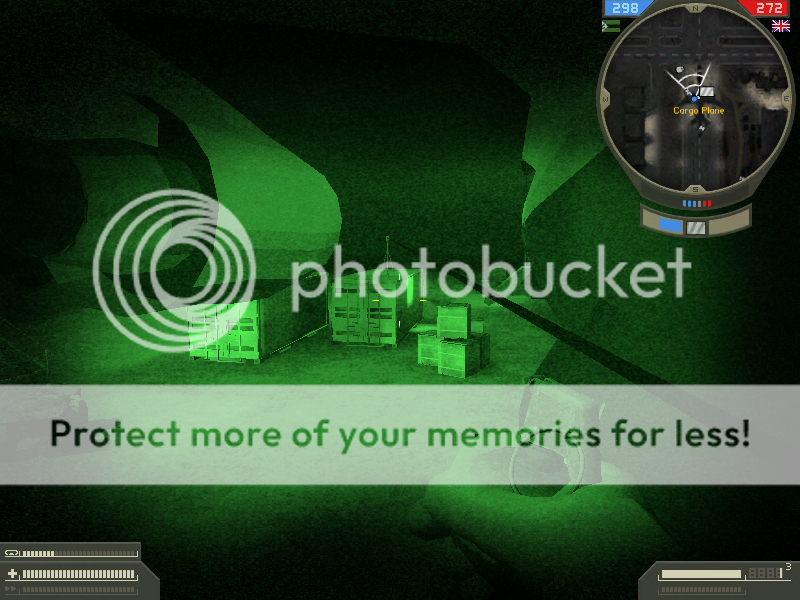
6.4) Cargo Depot
Flag Overview: The most central flag on the map, which makes it an important one as it the team that holds it will have quick access to three other flags. The flag itself is very enclosed, surrounded by cargo boxes, the area around the flag is also surrounded by no fewer than four warehouses, a crane, some other smaller buildings and more crates.

No lights in here, so Night Vision is a must, expect lots of grenades to be flying in through the multiple openings between the crates. You can’t watch all the entrances so grapple on to the crate nearest the flag, to hopefull avoid most of the grenade blasts. It will also confuse anyone who enters as they will most likely be looking at the floor
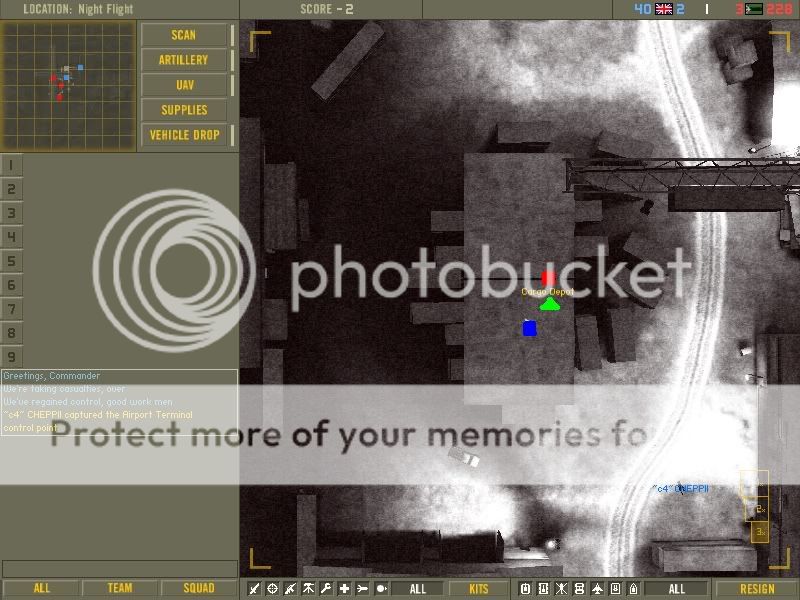
The flag is again the Red area, and the first screenshot taken from the Blue Square. The Green triangle you can see is the area on top of one of the crates, which you can cap the flag from.
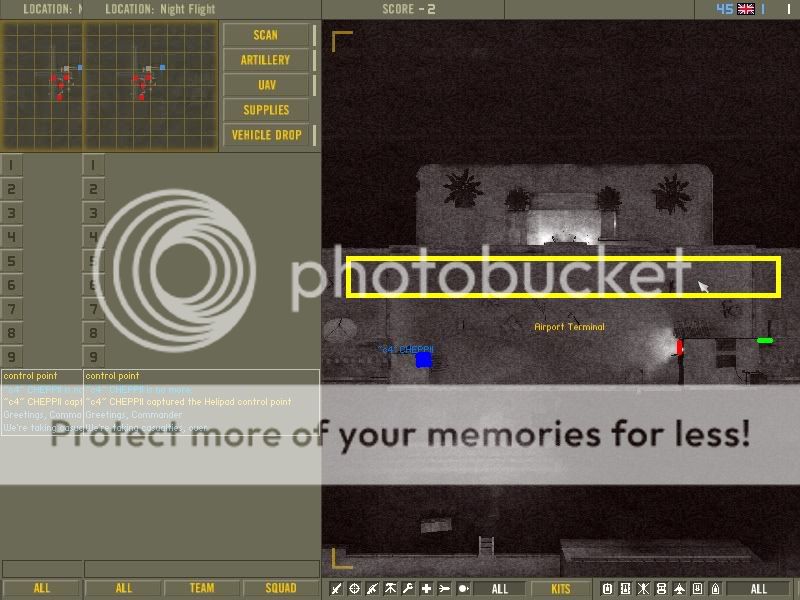
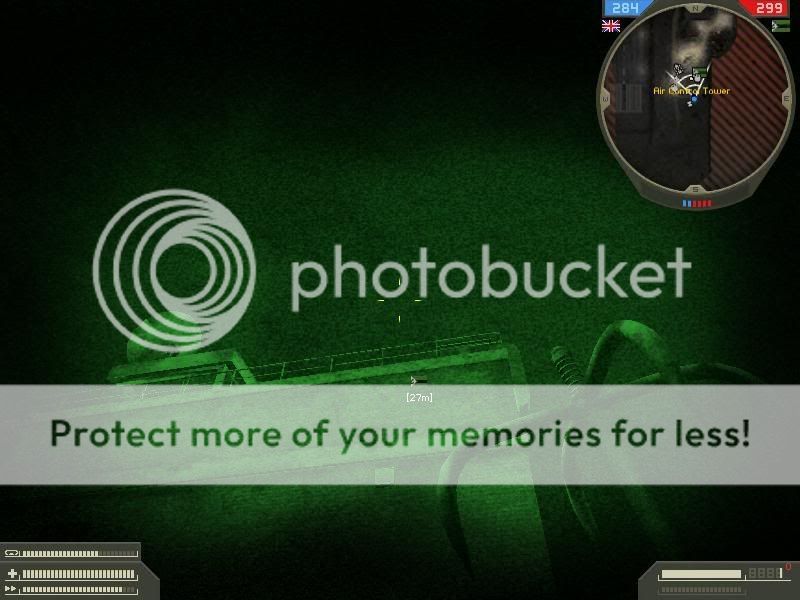
6.5) Airport Control Tower
Flag Overview: Although housing the all the Insurgents Commander’s toys, the Airport Control Tower flag takes no longer to cap than any of the other four capable flags. It is another roof flag like Airport Terminal, and also has one flight of stairs leading to it. There is no ladder however, so the safest way to reach it is again by Grappling Hook.
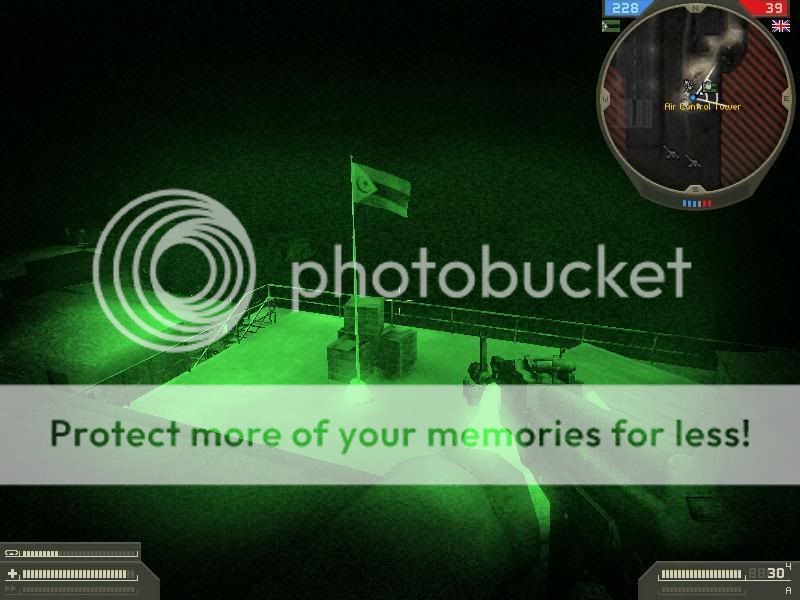
No real bright lights around, so it is best to cap this flag with your Goggles on. The flag can be capped from the box on the right of the screen.
As mentioned earlier, the best way to cap the flag is by Grapple, if you can’t do this you will have to use the stairs, but risk death by claymore. To reach the stairs that lead to the flag you can either use another flight of stairs, or a much more fun way. The lift. To use the lift simply walk up to it and press E (enter Vehicle key) to open the door(if it isn’t already open). When inside press E again and you will rise (or fall) like magic.
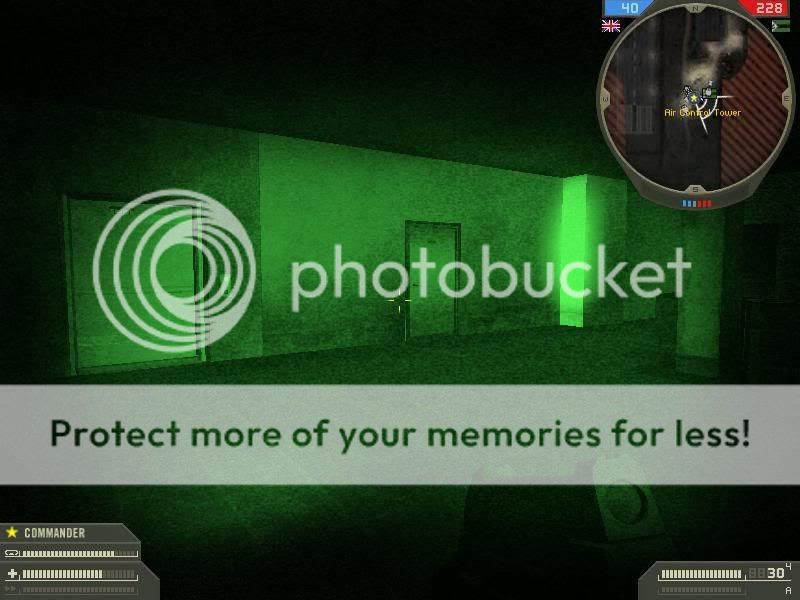
The lift is the opening on the left
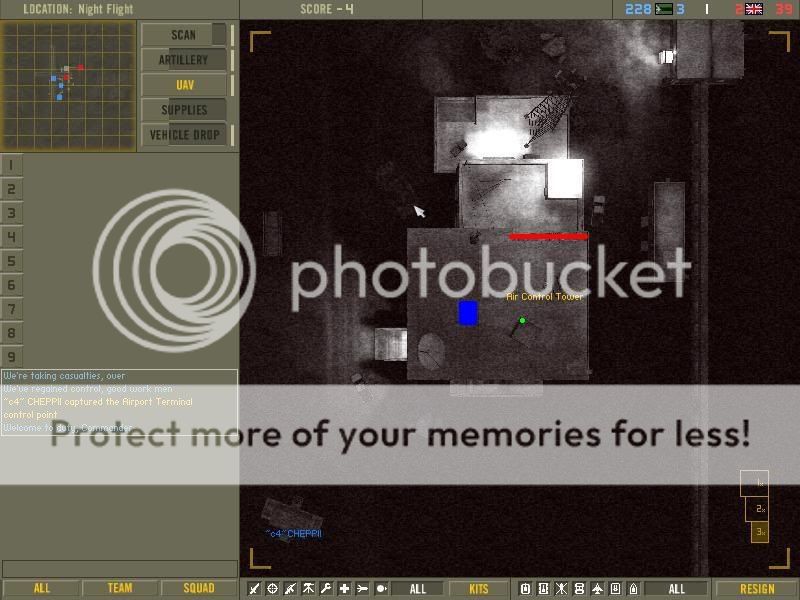
The long Red line shows the stairs up to the flag, and the small green dot on the box shows the tiny region on the box, which is in flag distance. The first Screenshot was taken in the blue area. This is also a very good spot to camp and guard the flag.
7) Vehicles and their uses
Despite there being no Helicopters and Jets, and only very poor piece of Armour. Vehicles are still very important. Night Flight is where the transport really gets to strut its stuff.
7.1) Quadbikes (ATV)
I use the British name for these vehicles as I hate the boring ATV name. As mentioned earlier, they’re 18 of these on this map and very handy they are too. “Hemmed in by the enemy?” “Arty just about to pound your face” then hope on one of these and you will be out of there in a flash. Attach some C4 for that added punch
7.2) AIL Raiders

The SAS main transport can house up to four men, three of them wielding M249 Saws. Great for transporting a squad quickly, with some strong firepower, the turning radius of the guns however (only about 70 degrees) make its sides and rear vulnerable
7.3) Civilian Car

The insurgents answer to the AIL Raider. This car can hold three players, two of which, get to control mounted weapons. The passenger next to the driver is much like the gunners in the AIL Raider, except using an RPK 74 instead of the Saw. The Rear gunner however, gets a .50 cal, with a full turning circle, making it the better of the two transports. You will quite often find one parked at choke points with just a gunner on the .50 cal.
7.4) Humvee
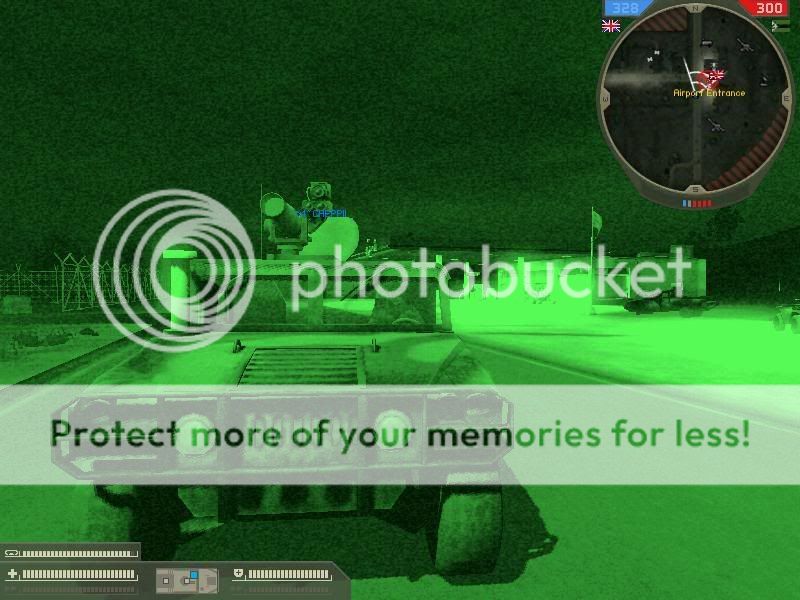
Similar to the ones in Vanilla BF2, except comes with a weakened TOW on top, which does the same amount of damage as the RPG and SRAW (Knocked the BMP2 down to eight blocks) Can transport only three (Thank You Globefish23 ) people like the AIL Raider, one driving, one manning the weakened TOW and one using handheld weapons in the rear. Strongest out of the five transports.
7.5) Forklift
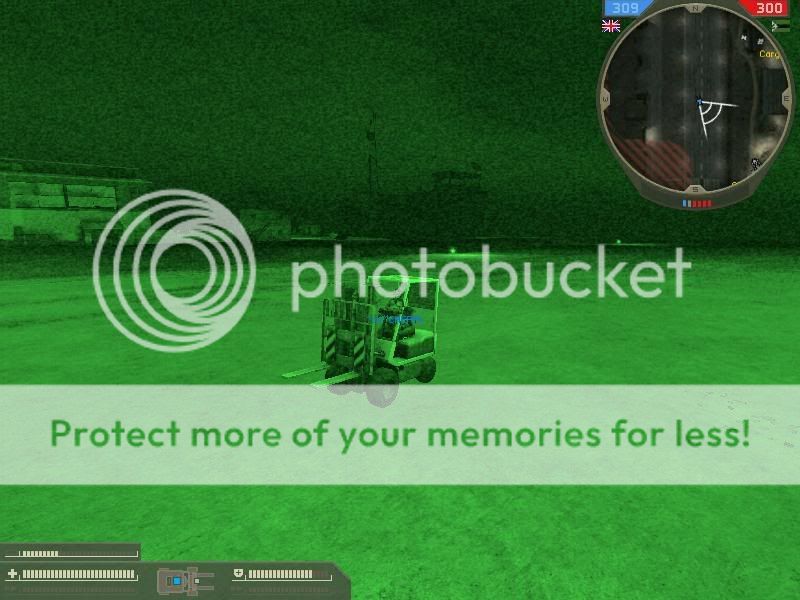
The ultimate in battle technology, the Forklift is a vehicle capable of transporting two people, one driving one on the forks, get your teamate the go Anti-Tank and you will have you own missile launcher! The Forklift spawns in a factory between Airport Terminal, and Cargo Depot, after extensive testing over which flag it belongs too, I cam to a conclusion that it is associated with the Airport Terminal flag.
7.6) BMP2
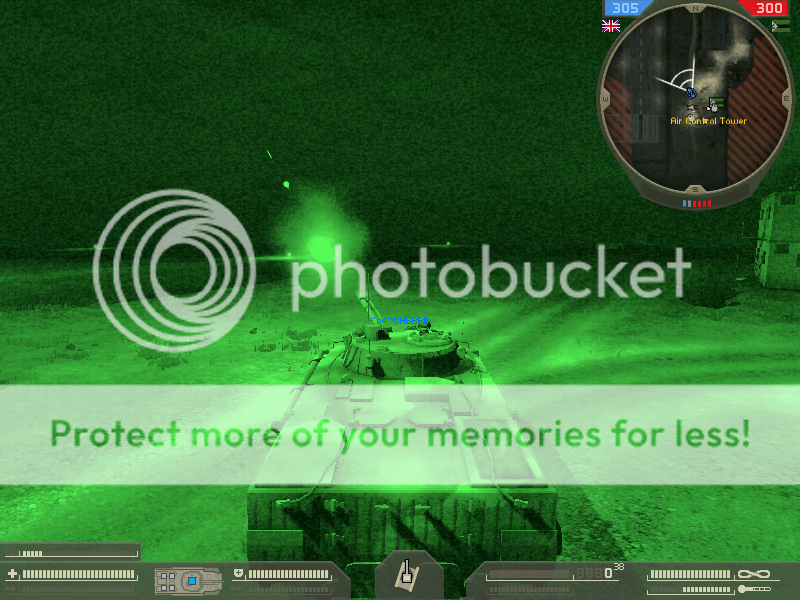
To keep the armour lovers happy, Dice included the BMP2 for the Insurgents, spawning at the Airport Control Tower only when the Insurgents hold it. I compare it much to the PLA Tank in Vanilla in terms of weaponry, speed, handling and aiming sights. With the difference being it has the armour of an APC, it also reminds me off a World War 2 tank in its appearance. A good Spec ops, Engineer or Anti Tank can easily take it out without so much as breaking into a sweat.
8) Which kits to use and why
Because you need the best equipment for the job in hand, this section should guide you through the kit selection. Each kit contains Night vision (#7) and a Gas Mask (#8)
8.1) Spec ops - Usefulness Rank = #4, Reasonable gun, C4 good for traps
SAS
Knife
9F2S Silenced
G36K or G36C
Grenades
C4
Zipline
The SAS spec ops contains a number of useful weapons, including the G36K, the only army in the game to use such weapon. C4 is very useful for flag guarding an attaching on the front of Quadbikes, and the Zipline for moving around the maps many accessible rooftops.
Insurgents
Knife
MR-444 Silenced
AK-74U or G36C
Grenades
C4
Zipline
Similar advantages as the SAS Spec ops, the AK-74U is one of the more powerful Spec ops weapons in the game
8.2) Sniper - Usefullness Rank = #7, just go sit on the roof and get out of the way
SAS
Knife
9F2S Silenced
M24 or Unlock 1 (M95)
Grenades
Claymores
Zipline
Coming with a bolt-action rifle, the SAS sniper packs a punch, and can knock a full health enemy down to two bars of health in a single shot. The claymores are very effective for flag defence, and the Zipline allows the Sniper to move into a better location without having to touch the ground. The SAS M24 comes with a red sight, compared to the USMC and SEALS black.
Insurgents
Knife
MR-444 Silenced
SVD or Unlock 1 (M95)
Grenades
Claymores
Zipline

The Insurgent sniper as more options than his SAS counterpart, being able to choose between the Semi Automatic SVD, which will kill in 3 shots, or the bolt-action M95. The Insurgent sniper also has Claymores and a Zipline at his disposal.
8.3) Assault - Usefullness Rank = #1, Good gun and a Grapple, you are the king
SAS
Knife
9F2S
F2000 or Unlock 1 (G3)
F2000 GL or Unlock 1 (Grenades
Flashbangs
Grappling Hook
The Assault soldier really comes into his own on this map, with weapons that can really pack a punch, and a Grappling Hook enabling him to reach flags and other areas, bypassing possible ambushes, the Assault solider is probably the most important in this Map.
Insurgents
Knife
MR-444
AK-101 (GP-30) Or Unlock 1 (G3)
GP-30 Or Unlock 1 (Grenades)
Flashbangs
Grappling Hook
Wielding the most powerful Automatic rifle in the map, and the ability to go any where with his grapple, and the blinding capability of his Flashbangs, be afraid, be very afraid.
8.4) Support - Usefullness Rank = #3, Ammo for my team, Tear Gas for my team
SAS
Knife
9F2S
MG36 or Unlock 1 (PKM)
Grenades
Ammo Bags
Tear Gas
Another of the G36 group gives the SAS something different in the support category, but I would suggest using the PKM if you can. The ability to give Ammo is important in any team, and Tear Gas is great in its room clearing abilities, and to use as cover.
Insurgents
Knife
MR-444
RPK-74 or Unlock 1 (PKM)
Grenades
Ammo Bags
Tear Gas
The two most powerful support weapons in the game really give the Insurgents the upper hand in the Support kit, the RPK-74 offering high damage and a better ROF than the PKM makes it a gun to be feared. The rest of the equipment is the same as the SAS, and is used in the same way.
8.5) Engineers Usefullness Rank = #5, Mines are very useful, rest of kit isn't
SAS
Knife
9F2S
MP7 or Unlock 1 (Jackhammer)
Grenades
AT Mines
Wrench
The Engineer kit is one of the less used on Night Flight, thought it does have its advantages. AT Mines are very good at getting fast moving Transport Vehicles who do not have time to react. Here the SAS hold the advantage, being able to choose between the Fast but weak MP7 and the semi automatic shotgun, the Jackhammer.
Insurgents
Knife
MR-444
S12K or Unlock 1 (Jackhammer)
Grenades
AT Mines
Wrench
Also underused, the Insurgent Engineer, has less options than his SAS opposite, choosing between two Semi-Automatic Shotguns, I would recommend the Jackhammer if you have it because of its slightly higher damage. Mines are useful for blocking the SAS from certain routes.
8.6) Medic - Usefullness Rank = #2, One of the few maps where Medics are not the best
SAS
Knife
9F2S
G36E or Unlock 1 (L85A1)
Grenades
Medic Bag
Defibrillators
Armed with the second Unlock from Vanilla BF2, the G36E, the SAS medic can, and is used, as a front line fighter to kill, as well as save.
Insurgents
Knife
MR-444
AK-101
Grenades
Medic Bag
Defibrillators
Not to be out done, the Insurgents medic uses the same weapon as his Assault teamate, minus the GP-30, allowing him to also be right in the action. Why the Medics have the best weapons in the game is anyone’s guess. But if you can’t beat them, join them.
8.7) Anti Tank - Usefullness Rank = #6, Just for the grappling hook
SAS
Knife
9F2S
MP5
SRAW
Grappling Hook
With only one BMP2 to fight, there is little need for the Anti-Tank class on this map, its Grapple can be handy, but if you want one, be Assault.
Insurgents
Knife
MR-444
PP19
RPG-7
Grappling hook
You get a cool Anti-Tank weapon, but think about it, why do you need an Anti-Tank weapon when there are no tanks?
9) Tactical weaponry
Like all Special Forces maps, except for Iron Gator, Night Flight uses the full range of Tactical weapons exclusive to Special Forces. Night Vision is one of them, but if I need to explain that to you then you are obviously just a Sheep who I have wasted my time on.
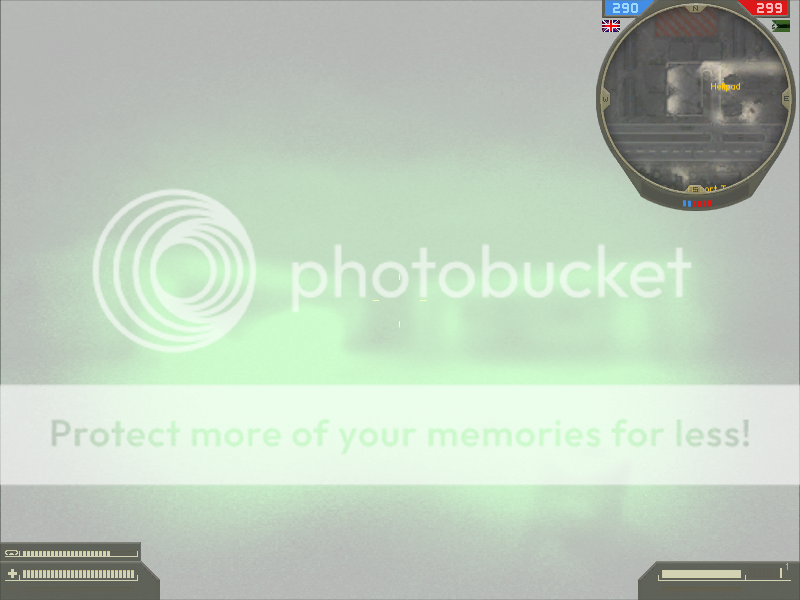
9.1.1) Tear Gas (Support)
Tear Gas is a weapon best used in buildings and enclosed spaces, which is handy as all Night Flight’s flags are in or near buildings and small spaces. The gas will make the victim screen go all blurry, they will start coughing and spluttering and hearing “that” sound (The one you hear when a tank fires right next to your face). They also will not be able to see anything such as UAV or Teamates on the Minimap. They are pretty much stuffed just asking for you to collect two points. The gas itself last for around five seconds, but its affects can last up to fifteen seconds, if they get a full blast of the stuff
Before Gas
After Gas
On drugs (As if i Know )
9.1.2) Gas Mask (All)
If you have had enough of walking around like you are pissed, use your Gas Mask (#8) All kits have it, so don’t go complaining that you didn’t know it was there. However it cannot be used at the same time as Night Vision, and will mean you can’t sprint, so it isn’t something that can just be put on and forgotten.
You will also hear yourself breathing heavily when using it.
9.2) Flashbang (Assault)
Although in Normal BF2 when using the F2000, all Special Forces Assaults get the Flashbang instead of the traditional Smoke Grenade. And against someone wearing Night Vision, they are very effective, leaving foes blind for up to ten seconds at a time!
Fire in the Hole
Oh I’m Blind, A mild Flash attack that still left my running into a wall for five seconds.
9.3) Grappling Hook (Assault and Anti Tank)
After the main gun and possibly the Defibrillators, the Grappling Hook is the most important piece of Equipment on the map. Allowing the user a quick and still unexpected route to both the Airport Terminal and Airport Control Tower, and allow the easiest route to the Cargo Plane trick and many other good locations. It is also very good to use instead of ladders, bypassing the likely Claymore and knifing the likely Sniper.
Not Suitable for Children under the age of three due to sharp parts
E to Climb
9.4) Zipline (Special Forces and Sniper)
At best, handy is what can be said for the Zipline. Good for a quick exit from the two roof flags, but a parachute can also do that. Can be used to move around Warehouse roofs, but as most are roughly the same height, there is a very high chance you will be easily pick off. Can also be used to do the Cargo plane trick, but involves precision jumping and Zipline to do, and will usually need two or three attempts, taking about as long as it does to catch the flag. Not a patch on the grapple route, but still funny to watch the enemy inside the Plane wondering what kind of hack you are using.
From the large crate
To get on the crate, you must first jump on the boxes, and then do a big a run up as possible to reach the crate. Then your Zipline must be in the exact place.
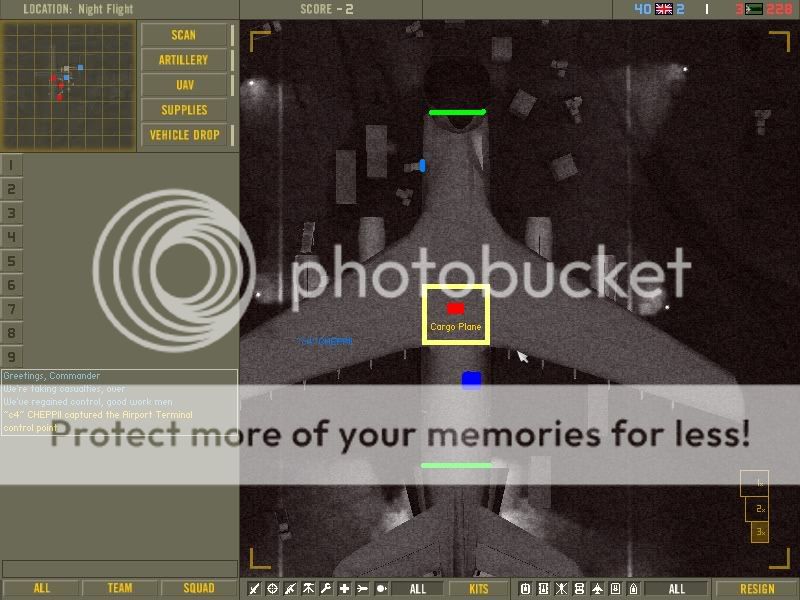
10) Commander Locations
Who is the most important member of your team? Your Commander that’s who. If you have a poor one, its like walking around with one eye covered.
10.1) SAS
Best to stay at home if you are playing with more than 10 players a side. Less than that and you should probably help your team on the field.
Try to stay under cover at all times, in case the Insurgent commander decides to turn his Artillery volley on you.
Its also a good idea to go Engineer, so you can manually repair your assets.
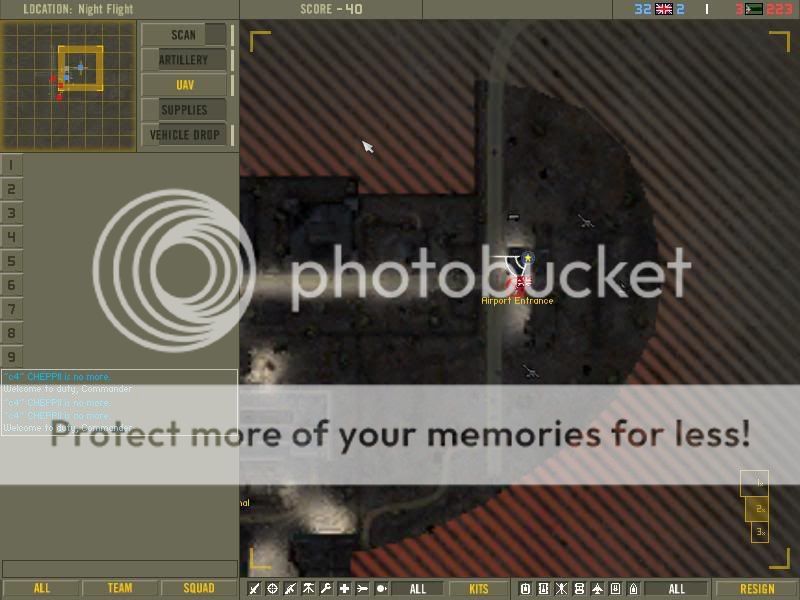
10.2) Insurgents
As Insurgent Commander, you have more to worry about. At the start of the round it is a good idea to Claymore the Airport Control Tower as shown. From here you should go and find a safe hiding place, preferably indoors, and get on with your duties
11) Conclusion
That’s all folks, All in all a very even map, one where Assault and transport vehicles really are the kings. But there is only so much a guide can tell you, so its time to go out in the field and play a bit of Night Flight, If you can find a server that is . Current ranked servers are: http://game-monitor.com/search.php?sear … val2=xpack
All rights reserved to ~c4~Cheppi. PM me if you want to copy anything, I will most likely say yes. BF2 playing name: ~c4~CHEPPI, Visit www.c4klan.co.uk - we are always looking for new members.
Statistics
Pictures: 63
Words: 5,000 +
Pages: 38 Microsoft Word pages
Having seen the previous guides by Snake and ipoon.be, I wanted in on the act. So here is my guide for the map Night Flight.
1) Introduction
Night Flight, as you can probably tell from the name, is a night map, the 3rd one in Special Forces, along with Devils Perch and Leviathan. It is the second SAS v Insurgents map after Warlord, and is contested around an abandoned civilian airport in Syria. Due to it being a Night Map, and that many get their SAS and Insurgent Medals and Ribbons from Warlord, it can be a very unpopular map. If you see a server quickly hop in and count yourself lucky. There are usually 1 or 2 at peak times, e.g. evenings and weekends. It is quite a good map to use as a server starter, I have found, especially if there are no other populated servers running it.
The map is one of the few that work well on Infantry Only, but it is still much better with vehicles and gives a fairer game. This guide will focus on the vehicle format; many of the tactics can still be used in IO.
All SF goodies (Zipline, Grappling Hook, Tear gas) are used in this map
2) Storyline
The Insurgents are trying to bring the airport back on line, presumably to hamper the British and Americans in the Middle East. The SAS have been sent in to clear out the threat, before the Insurgents have the airport fully operational.
Map Layout:
16p
32p
64P
There isn’t a large amount of difference between the 3 maps, an extra flag added on each size, and the 64player map can easily be played well with 32 players. Another difference that cannot be seen on the maps is that the SAS uncapable (Helipad) is PARACHUTE SPAWN at the 16-player size, but not at 32. In other words, the map isn’t hard to learn and once you have learnt one size, the others are not hard to adjust too. If you don’t like hills this is the map for you, as when did you last see a sloping airport?
This guide will focus on the 64 player map which is the one most commonly played.
3) Settings
It takes a while for most people to adjust to using Night vision (#7), and what settings you prefer. I suggest playing singleplayer for a bit if you are worried about stats, just to get used to Green. Here are some screenshots if you are too lazy to try it out for yourself
Low Graphics
Medium Graphics
High Graphics
Little difference for me with night vision on, I usually have mine on Medium, just because it always has been and I don’t want to go through all that optimizing shaders. Night maps make a good level playing field.
With Night vision off however
High Graphics
Medium Graphics
Low Graphics
All three taken from pretty much the same spot in the cargo plane, as would be expected, high graphics have the advantage. The difference is not as large as the screenshots show and anyway, night vision is needed in most places, so a good graphics card is worth little here.
Credit to JaggedPanther:
INCREASE YOUR GAMMA ON YOUR VIDEO CARD SETTINGS AND SAVE THE SCHEME AS BF2 NIGHT:
Therefore you won't need night vision goggles.
(^^Some people will do anything for points - Cheppi)
4) Flags and their vehicles
Because no one likes having to run, it’s important you know what vehicles are at each spawn point.
4.1) Airport Entrance (SAS Uncapable)
Main Spawn Second Spawn (Slightly nearer Helipad)
1x Humvee with Tow 2x Quadbike
1x AIL Raider
1x Quadbike (ATV)
1x UAV
1x Scan
2x Artillery
4.2) Helipad (Neutral) Same Equipment for both teams
4x Quadbike
4.3) Airport Terminal (Insurgent capable) Same Equipment for both teams
2x Quadbike
1x Forklift
4.4) Cargo Plane (Insurgent capable) Same equipment for both teams
3x Quadbike
2x Civilian car
4.5) Cargo Depot (Insurgent capable) Same Equipment for both teams
4x Quadbike
4.6) Airport Control Tower (Insurgent capable)
Insurgents: SAS:
1x BMP2 1x Humvee
2x Civilian Car 2x AIL Raider
2x Quadbike 2x Quadbike
1x UAV
1x Scan
2x Artillery
That’s a total of 25 transport vehicles and no less than 18 Quadbikes!
I tried to line up all 18 Quadbikes…
I managed to reach 9 before, one decided it had had enough and started a domino effect .
Still, I am claiming the world record for the most Quadbikes in a screenshot.
PM me with a screenshot if you can get more and take my crown as “World champion of most Quadbikes in a screenshot on Night Flight” J
Now lets get to the proper stuff, Fighting!
5.1) SAS Campaign
Firstly become a squad leader and invite trustworthy players to your squad. 4 should be enough.
Your best bet is to spawn at the back spawn point, and try and grab the Hummer or the AIL Raider for your squad, the three Quadbikes go very quickly meaning you will probably have to run.
The three main routes that are used are the Red, Yellow and Dark Blue, The light Blue and orange, are sub-routes of the Dark Blue and Yellow routes respectively.
Of course this is BF2, so 90% of players will run blindly down the red route, which is ok, as you need the helipad to avoid being pegged in your uncap, however this then leads to being held down at Helipad.
If you can get a full Humvee or The AIL Raider, take the blue route and surprise the insurgents by grappling up the back of the Terminal, If you are on your own or with only 1 other player, capping Cargo Depot is a better option, as it will almost certainly have very little defence.
Should you somehow get one of the 3 Quad bikes, then definitely take the yellow route and cap the Control tower, Now the insurgents are trapped from the North and South, with no UAV, Scan or artillery if you or a teamate blows it up (and you definitely should) and the BMP2 will no longer spawn.
Now the ticket bleed has been stopped, its time to squeeze those insurgents. The main battle will still be raging between Helipad and Airport Terminal, but this will, be gradually getting smaller, as the insurgents realise they are getting stuck in a corner. As they move to try and recapture Airport Control Tower, The sheep (Those predictable players that do the same thing round after round) as I like to call them can move in and take the terminal. Meanwhile yourself and a few trusted followers can mover in on the Cargo Plane, or the Cargo Depot. I recommend the plane, as it is easier to keep the insurgents hemmed in at the Depot. However by leaving Air control tower you will likely lose it, so you should way up the pros and cons of your next move. I would suggest attacking cargo plane, as although you will allow the insurgents their assets back, you can trap them in the southern corner.
It is advisable to keep your squad together and take one of the two cargo flags, if you split up, your likely end up with nothing.
Now you have the insurgents where you want them, the ticket bleed is going, and if you really want to you can just sit back and defend, letting it count down. The insurgents will eventually break through though, so its best to try and finish them off.
The majority will be spawning at the depot as it is nearest the action, and using to Quadbikes to try and break free. To stop a few escaping you need to surround the depot. Get a sniper to lay a few clays at the plane incase of anyone coming up from the Control Tower. Try and co-ordinate your attack so you all move in at the same time.
From then on its just one big battle, with all the insurgents at the control tower it will be very difficult to cap. As long as you can keep them pegged in you will win. If you really want the dramatic victory, sneak round the side or back and grapple on to the top.
5.2) Insurgent Campaign
Once again, join, or better create, your own squad, you’re not playing singleplayer now!
First off you have to realise that the map is made to allow the SAS the Helipad, and no matter what you try they will get there before you and in larger numbers. Rather than go all out down the obvious route (Straight line from the Airport Terminal to the Helipad) use back ways.
Once again 90% will go the obvious way, this is good for you though as it keeps the SAS trapped for long enough for you to spring your counter attack.
The green route is the quickest, as it involves using the Quadbikes at the Cargo plane. A Civilian Car is also handed for added fire power It is similar to the yellow route for the SAS, so you can also stop any SAS who are trying a breakout. Most of the SAS will be around the construction building in the red area. From the back you can quickly assault the flag and then in a classic pincer movement, crush the remaining ones in the red area with the help of the sheep at the Terminal. Once these are removed take up defensive positions up on top of the hanger and in the construction site.
The Orange route is slower, as it involves walking on foot to the SAS uncap, also check the server rules to see if they allow uncap attacking. Once here you can destroy the commanders assests and then take any available vehicle any move on to Helipad.
The yellow route is for the BMP2, yes I know its crap but what have the SAS got that is any better? With this added firepower and 4 crew members you can simply just drive up to the flag, get them all out and within 10 seconds the flag will be yours. If you see the Humvee, destroy it straight away, as it is the only defence, apart from handheld weaponry, that can take you down.
Now you have the SAS stuck in the Uncap losing tickets fast. Keep the BMP2 guarding the main road for transport vehicles and top of the range sheep (The ones that will keep jumping over the top of the building pressing p) As long as server rules allow it, infantry groups can use the Pink and Brown routes to spawn rape the SAS. You must still be wary of a break out through the gap in the fence (the blue bit) as the last thing you want is to see the Air Control Tower flag to turn Red, White and Blue while you are all spawn raping.
If you keep these routes covered there is little the SAS can do and it will be a quick and easy win for the Insurgents.
6) Flag secrets
Ok so these aren’t really that secret, but I suspect there is a few people don’t know about. I won’t do Airport Entrance as if you are there you are either in a crap team or spawn raping.
6.1) Helipad
Flag Overview: Nearest flag to SAS uncap. Nearest Insurgent flag is Airport Terminal. Starts at Neutral on 64p (Uncap at both 32 and 16) It can also be capped by vehicles.
Quite a lot of bright lighting which makes the helipad is a very difficult flag to take, as in it is better to have Night vision off when looking in certain directions (especially the hanger) Added to that there is a small flag radius, it is easy for any enemy to know where you are.
There are two places inside the building that are just inside the radius, one well known, and the other not so. They are shown on the screenshot below.
The two red areas are where the flag can be capped from inside the building. The smaller one is behind a table on some chairs, and is quite hard to get too. Thanks to Dice and their coding, you can see legs poking through the wall of the larger area, of which I have knifed many times. J
The blue area is where the first the top screenshot is taken from. And is a very good area to guard the flag.
Who doesn’t love grenade launchers
You can also grapple or Zipline onto the building right next to the flag for a surprise attack. You cannot capture the flag from up there though.
6.2) Airport Terminal
Flag Overview: Nearest Flag to Helipad and is where the majority of Insurgents will spawn. The roof is popular with snipers.
Easier lighting but still a very small radius makes capping the flag difficult. Most of the sheep will use the one and only stairwell to reach the flag, but if there is likely to be snipers on the roof there is also likely to be a nice claymore there waiting. A better bet is to grapple up knife the snipers and avoid their toys. If you don’t have a grapple and can’t find anyone else’s then the ladder behind the stairwell is a good choice.
Credit to Snake: Keep an eye on the UAV. Learn when people are using the stairs and lob flashbangs down it. They ruin peoples vision anyway, let alone with NV on. That'll hold them back a bit, and pop a nade or two down there as well to really keep them on their toes.
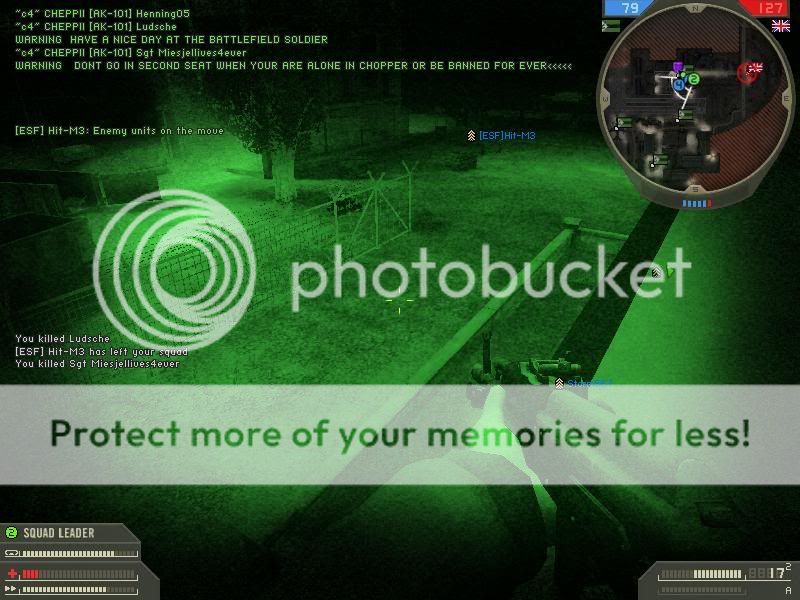
The Yellow area is where most snipers will be found, straining their eyes trying to see Helipad. The Stairwell is show as the red area, with the ladder shown I green behind it. A good camping hideout is on top of the stairs as you can shoot any sheep running from the stairs before they know what’s hits them, and allows you to keep an eye on the ladder. The blue area is where the screenshot was taken. Hide there if you wish to die as you are in plane view of the stairwell and people coming up the ladder.
6.3) Cargo Plane
Flag Overview: A very original flag (how often do you say that in BF2) and the maps focal point. The flag is in the middle of the cargo plane that landed at the airfield the previous night. The Area around the plane is very open; meaning running to the plane on foot is a bad idea. However once there, there is a multitude of boxes and crates to hide behind. Many sheep like to show off their driving abilities by driving a Quadbike inside the plane. There is no real need to do this and does not lead to a quick getaway after flag capture, as it slows the sheep down as they crash into crates and boxes.
The lighting in the plane is reasonable with both Night Vision on and off, I tend to have it on but, it is mainly player preference. The plane can only be entered by using the two ramps, one at each end (There is an open door you can jump in, but that is very close to a ramp so I don’t consider it to be a main entrance.) Most people think the flag can only be capture in the Cargo bay, as it cannot be captured from both above or below. But I have found another unknown way that is not even in the plane. It is easier to explain in pictures so divert your eyes downwards.
See the flap above the wheels? Well that’s what we are going to grapple onto, This can also be done with a Zipline, but the Grapple is the much easier route
Up goes the grapple
Ta dam, this can be done on both sets of wheels on either side.
Another way is to park a Quadbike by the flap, jump on the bike and then onto the flap. (I always find the easist ways last)
The flag and its radius are shown in their rough positions, with the two ramps shown in green and the side door by the North ramp in Light blue. The original screenshot was taken in the dark blue section. The sets of wheels are right on the edge of the yellow section.
6.4) Cargo Depot
Flag Overview: The most central flag on the map, which makes it an important one as it the team that holds it will have quick access to three other flags. The flag itself is very enclosed, surrounded by cargo boxes, the area around the flag is also surrounded by no fewer than four warehouses, a crane, some other smaller buildings and more crates.
No lights in here, so Night Vision is a must, expect lots of grenades to be flying in through the multiple openings between the crates. You can’t watch all the entrances so grapple on to the crate nearest the flag, to hopefull avoid most of the grenade blasts. It will also confuse anyone who enters as they will most likely be looking at the floor
The flag is again the Red area, and the first screenshot taken from the Blue Square. The Green triangle you can see is the area on top of one of the crates, which you can cap the flag from.
6.5) Airport Control Tower
Flag Overview: Although housing the all the Insurgents Commander’s toys, the Airport Control Tower flag takes no longer to cap than any of the other four capable flags. It is another roof flag like Airport Terminal, and also has one flight of stairs leading to it. There is no ladder however, so the safest way to reach it is again by Grappling Hook.
No real bright lights around, so it is best to cap this flag with your Goggles on. The flag can be capped from the box on the right of the screen.
As mentioned earlier, the best way to cap the flag is by Grapple, if you can’t do this you will have to use the stairs, but risk death by claymore. To reach the stairs that lead to the flag you can either use another flight of stairs, or a much more fun way. The lift. To use the lift simply walk up to it and press E (enter Vehicle key) to open the door(if it isn’t already open). When inside press E again and you will rise (or fall) like magic.
The lift is the opening on the left
The long Red line shows the stairs up to the flag, and the small green dot on the box shows the tiny region on the box, which is in flag distance. The first Screenshot was taken in the blue area. This is also a very good spot to camp and guard the flag.
7) Vehicles and their uses
Despite there being no Helicopters and Jets, and only very poor piece of Armour. Vehicles are still very important. Night Flight is where the transport really gets to strut its stuff.
7.1) Quadbikes (ATV)
I use the British name for these vehicles as I hate the boring ATV name. As mentioned earlier, they’re 18 of these on this map and very handy they are too. “Hemmed in by the enemy?” “Arty just about to pound your face” then hope on one of these and you will be out of there in a flash. Attach some C4 for that added punch
7.2) AIL Raiders
The SAS main transport can house up to four men, three of them wielding M249 Saws. Great for transporting a squad quickly, with some strong firepower, the turning radius of the guns however (only about 70 degrees) make its sides and rear vulnerable
7.3) Civilian Car
The insurgents answer to the AIL Raider. This car can hold three players, two of which, get to control mounted weapons. The passenger next to the driver is much like the gunners in the AIL Raider, except using an RPK 74 instead of the Saw. The Rear gunner however, gets a .50 cal, with a full turning circle, making it the better of the two transports. You will quite often find one parked at choke points with just a gunner on the .50 cal.
7.4) Humvee
Similar to the ones in Vanilla BF2, except comes with a weakened TOW on top, which does the same amount of damage as the RPG and SRAW (Knocked the BMP2 down to eight blocks) Can transport only three (Thank You Globefish23 ) people like the AIL Raider, one driving, one manning the weakened TOW and one using handheld weapons in the rear. Strongest out of the five transports.
7.5) Forklift
The ultimate in battle technology, the Forklift is a vehicle capable of transporting two people, one driving one on the forks, get your teamate the go Anti-Tank and you will have you own missile launcher! The Forklift spawns in a factory between Airport Terminal, and Cargo Depot, after extensive testing over which flag it belongs too, I cam to a conclusion that it is associated with the Airport Terminal flag.
7.6) BMP2
To keep the armour lovers happy, Dice included the BMP2 for the Insurgents, spawning at the Airport Control Tower only when the Insurgents hold it. I compare it much to the PLA Tank in Vanilla in terms of weaponry, speed, handling and aiming sights. With the difference being it has the armour of an APC, it also reminds me off a World War 2 tank in its appearance. A good Spec ops, Engineer or Anti Tank can easily take it out without so much as breaking into a sweat.
8) Which kits to use and why
Because you need the best equipment for the job in hand, this section should guide you through the kit selection. Each kit contains Night vision (#7) and a Gas Mask (#8)
8.1) Spec ops - Usefulness Rank = #4, Reasonable gun, C4 good for traps
SAS
Knife
9F2S Silenced
G36K or G36C
Grenades
C4
Zipline
The SAS spec ops contains a number of useful weapons, including the G36K, the only army in the game to use such weapon. C4 is very useful for flag guarding an attaching on the front of Quadbikes, and the Zipline for moving around the maps many accessible rooftops.
Insurgents
Knife
MR-444 Silenced
AK-74U or G36C
Grenades
C4
Zipline
Similar advantages as the SAS Spec ops, the AK-74U is one of the more powerful Spec ops weapons in the game
8.2) Sniper - Usefullness Rank = #7, just go sit on the roof and get out of the way
SAS
Knife
9F2S Silenced
M24 or Unlock 1 (M95)
Grenades
Claymores
Zipline
Coming with a bolt-action rifle, the SAS sniper packs a punch, and can knock a full health enemy down to two bars of health in a single shot. The claymores are very effective for flag defence, and the Zipline allows the Sniper to move into a better location without having to touch the ground. The SAS M24 comes with a red sight, compared to the USMC and SEALS black.
Insurgents
Knife
MR-444 Silenced
SVD or Unlock 1 (M95)
Grenades
Claymores
Zipline
The Insurgent sniper as more options than his SAS counterpart, being able to choose between the Semi Automatic SVD, which will kill in 3 shots, or the bolt-action M95. The Insurgent sniper also has Claymores and a Zipline at his disposal.
8.3) Assault - Usefullness Rank = #1, Good gun and a Grapple, you are the king
SAS
Knife
9F2S
F2000 or Unlock 1 (G3)
F2000 GL or Unlock 1 (Grenades
Flashbangs
Grappling Hook
The Assault soldier really comes into his own on this map, with weapons that can really pack a punch, and a Grappling Hook enabling him to reach flags and other areas, bypassing possible ambushes, the Assault solider is probably the most important in this Map.
Insurgents
Knife
MR-444
AK-101 (GP-30) Or Unlock 1 (G3)
GP-30 Or Unlock 1 (Grenades)
Flashbangs
Grappling Hook
Wielding the most powerful Automatic rifle in the map, and the ability to go any where with his grapple, and the blinding capability of his Flashbangs, be afraid, be very afraid.
8.4) Support - Usefullness Rank = #3, Ammo for my team, Tear Gas for my team
SAS
Knife
9F2S
MG36 or Unlock 1 (PKM)
Grenades
Ammo Bags
Tear Gas
Another of the G36 group gives the SAS something different in the support category, but I would suggest using the PKM if you can. The ability to give Ammo is important in any team, and Tear Gas is great in its room clearing abilities, and to use as cover.
Insurgents
Knife
MR-444
RPK-74 or Unlock 1 (PKM)
Grenades
Ammo Bags
Tear Gas
The two most powerful support weapons in the game really give the Insurgents the upper hand in the Support kit, the RPK-74 offering high damage and a better ROF than the PKM makes it a gun to be feared. The rest of the equipment is the same as the SAS, and is used in the same way.
8.5) Engineers Usefullness Rank = #5, Mines are very useful, rest of kit isn't
SAS
Knife
9F2S
MP7 or Unlock 1 (Jackhammer)
Grenades
AT Mines
Wrench
The Engineer kit is one of the less used on Night Flight, thought it does have its advantages. AT Mines are very good at getting fast moving Transport Vehicles who do not have time to react. Here the SAS hold the advantage, being able to choose between the Fast but weak MP7 and the semi automatic shotgun, the Jackhammer.
Insurgents
Knife
MR-444
S12K or Unlock 1 (Jackhammer)
Grenades
AT Mines
Wrench
Also underused, the Insurgent Engineer, has less options than his SAS opposite, choosing between two Semi-Automatic Shotguns, I would recommend the Jackhammer if you have it because of its slightly higher damage. Mines are useful for blocking the SAS from certain routes.
8.6) Medic - Usefullness Rank = #2, One of the few maps where Medics are not the best
SAS
Knife
9F2S
G36E or Unlock 1 (L85A1)
Grenades
Medic Bag
Defibrillators
Armed with the second Unlock from Vanilla BF2, the G36E, the SAS medic can, and is used, as a front line fighter to kill, as well as save.
Insurgents
Knife
MR-444
AK-101
Grenades
Medic Bag
Defibrillators
Not to be out done, the Insurgents medic uses the same weapon as his Assault teamate, minus the GP-30, allowing him to also be right in the action. Why the Medics have the best weapons in the game is anyone’s guess. But if you can’t beat them, join them.
8.7) Anti Tank - Usefullness Rank = #6, Just for the grappling hook
SAS
Knife
9F2S
MP5
SRAW
Grappling Hook
With only one BMP2 to fight, there is little need for the Anti-Tank class on this map, its Grapple can be handy, but if you want one, be Assault.
Insurgents
Knife
MR-444
PP19
RPG-7
Grappling hook
You get a cool Anti-Tank weapon, but think about it, why do you need an Anti-Tank weapon when there are no tanks?
9) Tactical weaponry
Like all Special Forces maps, except for Iron Gator, Night Flight uses the full range of Tactical weapons exclusive to Special Forces. Night Vision is one of them, but if I need to explain that to you then you are obviously just a Sheep who I have wasted my time on.
9.1.1) Tear Gas (Support)
Tear Gas is a weapon best used in buildings and enclosed spaces, which is handy as all Night Flight’s flags are in or near buildings and small spaces. The gas will make the victim screen go all blurry, they will start coughing and spluttering and hearing “that” sound (The one you hear when a tank fires right next to your face). They also will not be able to see anything such as UAV or Teamates on the Minimap. They are pretty much stuffed just asking for you to collect two points. The gas itself last for around five seconds, but its affects can last up to fifteen seconds, if they get a full blast of the stuff
Before Gas
After Gas
On drugs (As if i Know )
9.1.2) Gas Mask (All)
If you have had enough of walking around like you are pissed, use your Gas Mask (#8) All kits have it, so don’t go complaining that you didn’t know it was there. However it cannot be used at the same time as Night Vision, and will mean you can’t sprint, so it isn’t something that can just be put on and forgotten.
You will also hear yourself breathing heavily when using it.
9.2) Flashbang (Assault)
Although in Normal BF2 when using the F2000, all Special Forces Assaults get the Flashbang instead of the traditional Smoke Grenade. And against someone wearing Night Vision, they are very effective, leaving foes blind for up to ten seconds at a time!
Fire in the Hole
Oh I’m Blind, A mild Flash attack that still left my running into a wall for five seconds.
9.3) Grappling Hook (Assault and Anti Tank)
After the main gun and possibly the Defibrillators, the Grappling Hook is the most important piece of Equipment on the map. Allowing the user a quick and still unexpected route to both the Airport Terminal and Airport Control Tower, and allow the easiest route to the Cargo Plane trick and many other good locations. It is also very good to use instead of ladders, bypassing the likely Claymore and knifing the likely Sniper.
Not Suitable for Children under the age of three due to sharp parts
E to Climb
9.4) Zipline (Special Forces and Sniper)
At best, handy is what can be said for the Zipline. Good for a quick exit from the two roof flags, but a parachute can also do that. Can be used to move around Warehouse roofs, but as most are roughly the same height, there is a very high chance you will be easily pick off. Can also be used to do the Cargo plane trick, but involves precision jumping and Zipline to do, and will usually need two or three attempts, taking about as long as it does to catch the flag. Not a patch on the grapple route, but still funny to watch the enemy inside the Plane wondering what kind of hack you are using.
From the large crate
To get on the crate, you must first jump on the boxes, and then do a big a run up as possible to reach the crate. Then your Zipline must be in the exact place.
10) Commander Locations
Who is the most important member of your team? Your Commander that’s who. If you have a poor one, its like walking around with one eye covered.
10.1) SAS
Best to stay at home if you are playing with more than 10 players a side. Less than that and you should probably help your team on the field.
Try to stay under cover at all times, in case the Insurgent commander decides to turn his Artillery volley on you.
Its also a good idea to go Engineer, so you can manually repair your assets.
10.2) Insurgents
As Insurgent Commander, you have more to worry about. At the start of the round it is a good idea to Claymore the Airport Control Tower as shown. From here you should go and find a safe hiding place, preferably indoors, and get on with your duties
11) Conclusion
That’s all folks, All in all a very even map, one where Assault and transport vehicles really are the kings. But there is only so much a guide can tell you, so its time to go out in the field and play a bit of Night Flight, If you can find a server that is . Current ranked servers are: http://game-monitor.com/search.php?sear … val2=xpack
All rights reserved to ~c4~Cheppi. PM me if you want to copy anything, I will most likely say yes. BF2 playing name: ~c4~CHEPPI, Visit www.c4klan.co.uk - we are always looking for new members.
Statistics
Pictures: 63
Words: 5,000 +
Pages: 38 Microsoft Word pages
Last edited by ~c4~cheppi (2007-04-09 04:23:59)

