Hi there,
I'm here today not to have a guide to using sticky bombs and pipe bombs, etc, but more showing you some sneaky spots you can get up into as a demoman (And likely soldier too) on Goldrush. For the record, I generally only need one sticky bomb to get up on these spots, so you don't need to take any more damage than is necessary. Also, not all of these spots are useful, but I find each and every one to be entertaining nonetheless.
You may ask, why Goldrush? I have chosen this as I find it has an absolute ton of spots, which is mainly due to the large number of protruding ledges, and the high ceiling of the map itself.
So, on with the Show:
Goldrush, Map 1:
This map doesn't really feature all that many spots, however there are a couple of useful ones which are based around the second point.
------------------------------------------------------------------------------------------------------------------------------
On top of the skull: Not really a useful spot for matches, susceptible for sniping, rockets and general pain.


Protruding light: This spot is good for harassing the snipers in the brown box in the below picture, or using stickies on the cart below.


Protruding Ledge: Similar to the above spot, however any class can get up here without taking any damage, but it doesn't give as good a view on the sniper box as the previous spot. Get up here from the little ledge on the top building


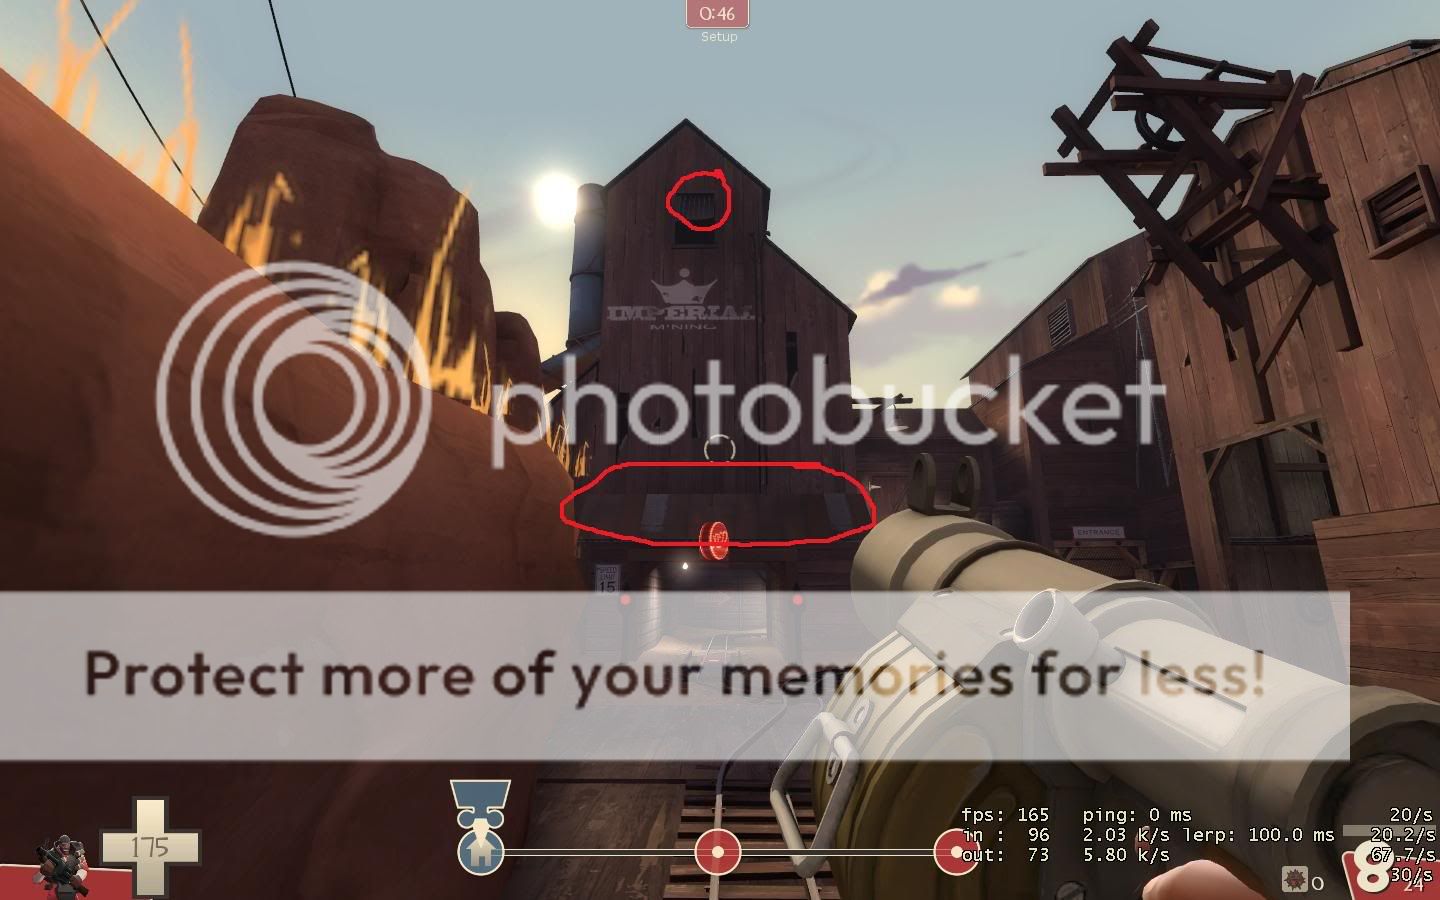
Area above Base: The lower circle shown on the picture below can be useful for defending the cart, but like the skull, makes you easy fodder for snipers and rockets. The second spot, however is good if you can get on the other team for spawn camping.


Ledge up Top: Most of you would know about here, but I thought I'd point it out regardless.

Goldrush, Map 2:
By far, the best map for this. Whilst the first point is very meh, the second point is abundant in awesome spots to camp as demoman.
-------------------------------------------------------------------------------------------------------------------
Point at Back, Point One:
Fairly average point as Red, as has rockets and snipers on you like aids. However, if you can get here as blue ( might want to use 2 stickies for this), you can easily camp the people coming to defend the first point from the tunnels.

Front of Tunnels: There are honestly so many points that I can't be bothered marking every one, but I have labeled them all on this first diagram. Basically, anything with a small ledge protruding you can get up on.

Some Examples of the Above Locations


Left Hand Ledge/ Inside Black Tube thing: This first spot gives a cool shot on the sniper ledge, but the second one is just pure awesome imo.


Inside the Black tube ( You are invisible in here):

On the Sign to the Right of Tunnels: Big fucking RED sign, you can't miss it. Gives a good view down and into the top building.

Protruding Light to Left of the Tunnels: Like the big sign, gives a good view down and into the other side of the top building.

Spot above Center Bridge: This spot is absolutely awesome. There are 3 ledges you can easily get up on, and they all provide an incredible view down on the cart. The top one is the best. but probably the hardest to get up onto. Probably the most useful of all spots.


Spot at end of map: Another good spot for defending the cart once it reaches the latter stages of the map.


There is also another spot inside the loft area after capping the first point, so if you stickie through the window as red, you can get up on a ledge and camp them in there.
Goldrush, Point 3:
When you consider how good the last map's spots were, this map really doesn't have many that I've found, and all the good ones are based around the first point. Anyway, here they are.
--------------------------------------------------------------------------------------------------
First Point Cap Camp: These are good spots for raining down hell on the group of people capturing the first point. There's the point at the very point which is nice, and the spot in the corner which is better after they've capped the point.


Second Point Cap Camp: These spots are average but can be used to camp regardless. There is a spot on a small ledge, and a spot on a light.


Really Bad Third Point Spots: Why you would use these, I don't know.


That's about it for Goldrush, as far as I've discovered. However I urge you all to keep exploring on all maps, and if you find an interesting or cool place, feel free to post it here.
Enjoy.
I'm here today not to have a guide to using sticky bombs and pipe bombs, etc, but more showing you some sneaky spots you can get up into as a demoman (And likely soldier too) on Goldrush. For the record, I generally only need one sticky bomb to get up on these spots, so you don't need to take any more damage than is necessary. Also, not all of these spots are useful, but I find each and every one to be entertaining nonetheless.
You may ask, why Goldrush? I have chosen this as I find it has an absolute ton of spots, which is mainly due to the large number of protruding ledges, and the high ceiling of the map itself.
So, on with the Show:
Goldrush, Map 1:
This map doesn't really feature all that many spots, however there are a couple of useful ones which are based around the second point.
------------------------------------------------------------------------------------------------------------------------------
On top of the skull: Not really a useful spot for matches, susceptible for sniping, rockets and general pain.
Protruding light: This spot is good for harassing the snipers in the brown box in the below picture, or using stickies on the cart below.
Protruding Ledge: Similar to the above spot, however any class can get up here without taking any damage, but it doesn't give as good a view on the sniper box as the previous spot. Get up here from the little ledge on the top building
Area above Base: The lower circle shown on the picture below can be useful for defending the cart, but like the skull, makes you easy fodder for snipers and rockets. The second spot, however is good if you can get on the other team for spawn camping.
Ledge up Top: Most of you would know about here, but I thought I'd point it out regardless.
Goldrush, Map 2:
By far, the best map for this. Whilst the first point is very meh, the second point is abundant in awesome spots to camp as demoman.
-------------------------------------------------------------------------------------------------------------------
Point at Back, Point One:
Fairly average point as Red, as has rockets and snipers on you like aids. However, if you can get here as blue ( might want to use 2 stickies for this), you can easily camp the people coming to defend the first point from the tunnels.
Front of Tunnels: There are honestly so many points that I can't be bothered marking every one, but I have labeled them all on this first diagram. Basically, anything with a small ledge protruding you can get up on.
Some Examples of the Above Locations
Left Hand Ledge/ Inside Black Tube thing: This first spot gives a cool shot on the sniper ledge, but the second one is just pure awesome imo.
Inside the Black tube ( You are invisible in here):
On the Sign to the Right of Tunnels: Big fucking RED sign, you can't miss it. Gives a good view down and into the top building.
Protruding Light to Left of the Tunnels: Like the big sign, gives a good view down and into the other side of the top building.
Spot above Center Bridge: This spot is absolutely awesome. There are 3 ledges you can easily get up on, and they all provide an incredible view down on the cart. The top one is the best. but probably the hardest to get up onto. Probably the most useful of all spots.
Spot at end of map: Another good spot for defending the cart once it reaches the latter stages of the map.
There is also another spot inside the loft area after capping the first point, so if you stickie through the window as red, you can get up on a ledge and camp them in there.
Goldrush, Point 3:
When you consider how good the last map's spots were, this map really doesn't have many that I've found, and all the good ones are based around the first point. Anyway, here they are.
--------------------------------------------------------------------------------------------------
First Point Cap Camp: These are good spots for raining down hell on the group of people capturing the first point. There's the point at the very point which is nice, and the spot in the corner which is better after they've capped the point.
Second Point Cap Camp: These spots are average but can be used to camp regardless. There is a spot on a small ledge, and a spot on a light.
Really Bad Third Point Spots: Why you would use these, I don't know.
That's about it for Goldrush, as far as I've discovered. However I urge you all to keep exploring on all maps, and if you find an interesting or cool place, feel free to post it here.
Enjoy.