Preach on brother... I hate all religons, they kill more than they save. I have been to Iraq and seen what happens when people die for a diety: THEY END UP FUCKING DEAD. Any Muslim that claims Israel is the enemy should be deemed a terrorist and locked in Gitmo until the democrats take over!TheDrNailsGuy wrote:
LOL, you are so right.....sooo......sooo right....You said Israel is the "ONLY ONE WITH THE POWER TO STOP THE VIOLENCE"...........CameronPoe wrote:
I think you fail to see that Israel is one of the primary sources of instability on the surface of this small rock orbiting the sun. I can't think of a similarly unstable region of earth that has such a wide impact (aside from Iraq maybe). I will not be supporting Israel as I'm sure you have gathered. Many Europeans abhorr the actions of the government of Israel too. You don't 'have to' support Israel - that is ludicrous.TheDrNailsGuy wrote:
Why don't some people wake up and take a look at Israel and learn something??? You cannot reason with these crazy religious freaks trying to blow us up and kidnap and torture innocent people! I'm not Christian, Muslim, or Jewish, I'm just looking at this with a persepective of logic.......What do you do with terrorists who tell you straight to your face that you and your way of life need to be wiped off the face of the earth???? WHAT?
You CANNOT REASON WITH THEM and Israel isn't even trying.......They defend themselves and don't take any crap. What does this tell their enemies? What does it tell you? Strike Isreal they will strike you back ten times harder. This is called a deterrent.
The problem with America is our whole Government! I love this country and every single day I think about how lucky I am to have been born here. Our government was set up so different parties with different ideas could speak their opinions and the people of America would benefit from the best ideas from both parties. But the problem is that no party supports the other, even though it may end up costing American lives!
What good is it to the American people when half of our government tries to undermine the other for their own personal gain? This goes for both parties. When one has a good Idea, the other automatically decides it would destroy America and does EVERYTHING within there power to PREVENT the positive outcome of that idea, just so they can be percieved as the better party?
We HAVE to support our troops.....We HAVE to support Israel.......If we don't this world will become more unstable! This is fact. Disagree with it all you like, but please just think what would happen if we leave Iraq right now, and if Israel gave into the demands of terrorists.......
I don't get what your whole America diatribe has to do with anything.
CANNOT REASON WITH THEM? Well you often do find it hard to reason with someone if you're not even talking to them. LOL! Hamas implictly recognised the existence of the state of Israel and what do Israel do? Wreck the Hamas ceasefire by shelling a Palestinian family on a beach. Of ocurse you can come up with a 'well they did this' retort but that's what this is a vicious cycle of violence. Somebody needs to stop it - the only ones with the power to do so are Israel.
Israel ARE the only ones who are going to stop the viciouse cycle of violence......and it looks like they are going to do so with a bloody fist.
They (Israel) obviously killed innocent people, that can't really be desputed except by the ignorant, but they obviously didn't mean to do it. Their would have been nothing to gain and everything to lose.
They didn't purposefully sneak across the border and take hostages.
What do you think you can tell a flag burning, hostage taking, suicide bombing, plane jacking, brain washed, western hating muslim to make them understand that they can't kill us? Like I said, some people will just never understand that these terrorists WANT YOU AND YOUR WAY OF LIFE DEAD. They don't want peace unless it's only shared by others with their views. They have exspressed this many times.
Look, all I know is all I want is to have a family, enjoy the hobbies I love, ride my motorcycle, live to a ripe old age, and I cannot do that while my country is being attacked by religious freaks, be it Timothy Mcveighs' or Mohommads'. And I havn't seen Israel exspress their approval of my countries demise.
Search
Search results: 50 found, showing up to 50
So you would like to see another Genocide of the Jews? Dude, Israel has had to fight for over 60 years to keep their borders safe. And we will not even begin to address the atrocities of Germany and Russia when it comes to those of Hebrew decent. Give them a break if they go extreme. War is Hell, and men, women, and children will die. If you want to get anti-semitic go ahead and join Hezbollah... They are always looking for foolish new members to die for their cause.CameronPoe wrote:
My post isn't a pro-Islam post - it's an anti-Israel post.
Every Middle-Eastern Arabic nation has wanted to destroy the Zionist state of Israel. You are just siding with the aggressors on this one!
There are only 19 ribbons for BF2, why would it not show up if there is a 20 ribbon limit??
You know, as much as I hate to admit it, all the reasons for going to Iraq given to the people of the US by their leaders, were just half truths to cover up the main reason. Iraq is the perfect staging area to commence war with the entire Middle East.
There were no Al-Qaida members in Iraq during the Saddam regime. The only terrorists Saddam had were those he employed in his Fedahyeen shock troops (not counting his late offspring). Were the chemical weapons in Iraq at the time of the initial US attack? Very few if any. Was Saddam in cahoots with Bin Laden? Saddam would never lower himself, he was too maniacal and enjoyed governing by separating church and state. Did Saddam hate America? Only because he was envious of the power that America wields within the rest of the world.
There is a reason why we are not officially calling this Desert Storm II. It has nothing to do with removing any one regime from power. The war is simply to send a message to terrorists world wide that the events of 9/11 that acts of cowardice aggression will be persecuted to the extreme, with death being the only resolve for those who dare harm the United States.
While the current Commander-in-Chief may appear to be somewhat slow in some areas, but he has done the right thing in Afghanistan and Iraq. I may not have agreed with his reasoning while I was in Iraq. Now that I am home and a civilian (YES I WAS HONORABLY DISCHARGED) and had time to reflect and look at the larger picture. I commend the 43rd President of the US for his actions abroad.
Dude, you are in an area where homicide is preferred to suicide. Just remember, it is a sin to kill yourself, but to kill others is safe for the environment. LMAOJbrar wrote:
that means half my Christian Mennonite school is Emo, FUCK
*NOTE* I DO NOT CONDONE MURDER!! What I wrote above is "sarcasm".... I don't want any of you going on a killing spree and then blaming me for it. (end of disclaimer)
Dude... Here I thought I had too much time on my hands.
Nice job +1 for you!
Nice job +1 for you!
I am usually on between 2245 to 0130 CTMafiaz wrote:
Anyone that plays late in the night?
Does anyone know how to calculate artillery kills? I tried looking at my total kills subtracted weapon & vehicle kills from it and still had quite a few left over? Is this the best way to handle it, or is there some virtual magic the admins can perform to help me calculate it?
If anyone knows where I can find the answers to the questions above, please let me know. Much thanks!
If anyone knows where I can find the answers to the questions above, please let me know. Much thanks!
Excellent tutorial, Comet.
The only disagreement I have is within the section quoted above. If you want to revive someone and they get killed 2 seconds after you have just revived them, DO NOT revive them again. You are going to piss the player off because he is losing more time by you stat-padding your med score . Take care of the enemy first, then tend to the wounded. Once again, nice job. +1 Karma for youcomet241 wrote:
Mistake #2) If you revive somebody, they still get a death score
I have run into this situation a number of times if a save a guy two or three times in a row during a heated firefight. He may complain and say something to the effect of: STOP REVIVING ME!!!! I KEEP GETTING KILLED!!!! ……. I always explain that if you get revived, it dozen’t count as a death. The guy that killed you gets a kill, and the two points, but you don’t have a death against you. The usual response is: Oh…. I’m surprised more people out there aren’t aware of this simple fact. Spread the word people. Even if you revive them and you get that nasty surprise ‘nade a second later taking you both out, it only counts as one death for the guy, so don’t feel bad, hey, at least you tried. And that’s your job as a medic, to risk your life to save other people’s lives. While you may not be always out there killing people and reducing their tickets, every time you revive somebody and he gets another chance to get out there and do some damage, you saved your team from losing a ticket. So don’t look at it like you aren’t having a HUGE impact on the outcome of the game, you are. I have seen numerous games come down to a difference of 10 tickets or less….. 10 revives in a round is not hard to do, and it could mean the difference between a win or a loss.
Dude I don't care if BF 2142 comes out tomorrow, I absolutely will NOT BUY IT until they fix all the bugs out of BF2. I love BFV and BF1942, the series has rocked so far, but I do not want to invest in a game that will have limitless "Microsoft moments".FurryJello wrote:
If you have not bought them by now I would not. BF 2142 is supposed to come out in 4 months.
Every P&K server I have seen has been ranked...PCShooterNoob wrote:
I have no problem with pistol/knife assuming it's not ranked. Servers like this are just grand scale stat padding, and the ranks mean nothing if everyone can get away with stat padding. But if it's not ranked anyway, who cares? Go nuts.
Sorry, but I have to put my 2 cents in here. These people who rent ranked servers should run them however they see fit. They are the ones paying for our enjoyment. Their word is what matters not EA's. EA's went out the window after we payed $50 for the game.
If you want to play full out BF2 no restrictions go to one of the 500+ ranked servers out there. If you have nothing better to do than to go on a restrictive server and trying breaking their rules, then you should not only be banned but have your stats erased for being cheap statpadding smacktard.
Follow the server rules, and everything will be kosher. Break the server rules intentionally, and suffer the consequences. I did not want to sound like an ass, but I figured it would be best to be blunt and end this thread.
Wow! That is so frigging brilliant!... That would free me up from posting UAV's for squad leaders who are being overrun if they could get direct communications to aircraft. The only down side I see, what happens to you when an enemy steals an aircraft and knows where you want to strike. That is never a good thing.ShowMeTheMonkey wrote:
No, the BEST command we need is an "Air support required" or something like "Air strike here" and "Heli strike here" which squad leaders and commanders can do, that only shows up on pilots views as a symbol like the artillery symbol, like a circle with other circles. This would stop planes and helis randomly searching, and give them a real problem that they could easily destroy! Imagine seeing a load of APC's and tanks, then saying "Air Strike Needed" and seeing a bomber come over and pound their sorry assess!
(edited for improper use of the English language)
Not to mention making the maps interchangeable for the 2 games would be great. I would love to play Kark, Sharqi, even Fushe with the sf ad-ons. Or possibly changing them to night maps for SF would be pretty awesome as well.FrankieSpankie3388 wrote:
I actually totally agree with you with the BF2 maps being available on SF. It's stupid because if you want to play one of the maps for the other, you have to close down then reopen BF2. It's kind of stupid, they should definitely fix that.
I think the map looks great, the only thing I would love to see is a darker setting (like "Midnight Sun") but it has caught my eye and I cannot wait to play it when it is released. Perhaps some of you with game design abilities could put together a PLA vs USMC urban map? Perhaps a push into Beijing or if we really want to step on some toes how about Pyongyang, North Korea? I am sure Kim Jong Il would be pleased to see USMC forces represented shoving frags in his lower orifice.
Call me crazy, but how many people are out actually looking for defensive explosives? In the heat of battle, too many people do not pay attention to the HUD/mini map: They end up hitting their own friendly mines marked with the Jolly Roger and do not move when artillery is hitting their sector. Maybe if we marked friendly explosives with Smiley faces and enemy explosives with the skull and crossbones it would work...Anfidurl wrote:
Just thought of another thing. (Sorry for the double post).
How about adding the spotting of Mines/Claymores?
For instance: "Active Claymore, our sector!"
or "Enemy Anti-Tank mine, on the road!"
(Can you tell I've been playing Warlord?)
The mines and such would appear on the HUD/Mini-map, and your squad and team would know.
Hopefully.
FN5.7 one of the most deadliest pistols on the market.... I bought one back in may for $800 I love it!!!vedds wrote:
Na man screw the DE - Bring on the FN FiveseveNdrug_dealer111 wrote:
They need like 2 or 3 pistol unlock...maybe desert eagle...?[killer]manxs wrote:
Also they should add a glock 17 for a unlock!
The Vagina Hunter, Vagina Fiction, Indiana Vagina and the Last Crusade, The Last Tempation of Vagina, SWAV Special Weapons and Vagina, Lock Stock and 2 smoking Vaginas, Vagina in 60 seconds, Vagina break, Vagina the Barbarian, The Breakfast Vagina, The Vagina Samurai, Mission: Vagina, Vagina Rats, Chasing Vagina, Memoirs of a Vagina, the Vagina of the Opera, Resident Vagina 2: The Yeast Infection.
How many more do you want???
How many more do you want???
OOPS I apologize. +1 Karma for my fuck up for Cbass and +1 Karma for Dubbs pointing it out. Good job mandubbs wrote:
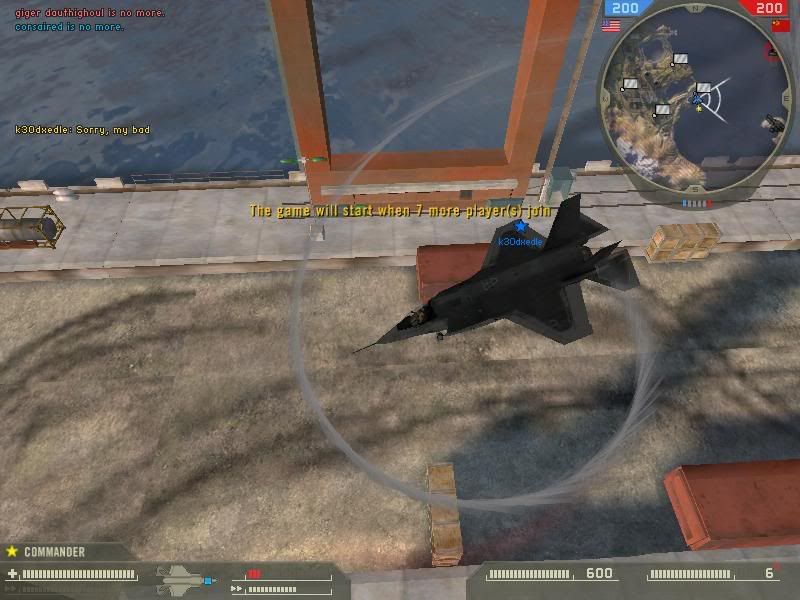
Was going to ask that myself, but I saw the Game will start when 7 more players join.Dakota2x wrote:
Question: What the hell is a commander doing flying?
Question: What the hell is a commander doing flying?
A Clockwork Vagina
War is terrible thing, I think that we all may be able to agree with that (especially those of us who have been through it). The problem does not lie in what weapons dictator X used to kill people Y. The problem is that the media is edited, commentated, and publicized by humans. Everyone has their own biased agenda that they try to persuade others to their line of thought. Take away the media's rights to cover the war. Let the soldiers do the dirty work that needs to be done. So that all fighters in this tragedy can come home.
Can I get that in .PDF format please?? Awesome job, mate +1
AFFCaptKaboom, thank you and well done!!! You give us married people a chance to showing up these kids... +1 Karma for you dude. Once again: WELL DONE!
Just curious as to the requirements for the "Sharpshooter Infantry Medal", according to UBAR it says as long as you have expert badges for all 7 kits, as well as expert badges for pistol and knife combat. What I do not get is that there is a minimum requirement of 400 hours playing time... It takes at least 700 hours to get expert badges for the kits. Is this EA/DICE's way of messing with my head while I am at work???
Warrant officers? Interesting concept... Would you want it go to CW5?seymorebutts443 wrote:
agreed, they should move the qualifications for sergent major and master gunnery down and add in warrent officers
OMG Chuy!! You know that is as wrong as two boys scrogging in a catholic church at 5am mass. I love it!! +1 Karma for ya!
Hueys rock!! But I don't think Wagner would be appropriate for your transporting, you need something a little darker for BF2, possibly Apocalyptica's cover of "One" or Carl Orff's "O! Fortuna"
A few things I would love to see in patch 1.4:
- Binoculars or Laser Range Finders for squad leaders and commanders/ and possibly snipers
- A little bird or Cessna for SF maps.
- Copperhead rounds to use with Laser Range Finder for Squad Leaders.
- Hand Grenade qualification badge.
- making BF2 maps available to play on BF2SF
I know these ideas are wishful thinking, but wth, that is what this section is all about right?
Second tutorial regarding Commanders is currently posted in the BF2 HELP section
Battlefield 2 - Commander’s Intent Briefing:
By Dakota2x
I. Introduction
II. Order of Command
III. Commander’s Discretion
IV. Conclusion
I. Introduction:
Normally, I would not write a whole guide on the way I find most effective for commanding, but sometimes I find things that should be addressed. So here is, yet another, “great tutorial” to commanding.
Author’s note: You will notice male pronouns used throughout this tutorial. Ladies, no offense, I know you are out there and play BF2 just like guys do (and yes you are usually better than us at times). I am just used to when I was in the military and all of my commanders there were men.
II. Order of Command:
Volunteering for commander is like volunteering for Explosive Ordinance Disposal detail; depending on which way you go you can end up as the hero of the day, or have people walking all over what is left of you. You are dependent on your team members to rack up points for you, and your team members are dependent on you to keep them with all the supplies, vehicles, intelligence they need.
I will not go into details of the assets in here. If you are new to commanding, then check out some of the other tutorials on commanding. There are some awesome ones out there and helped me to get to where I am now in the game!
A). SITUATIONAL AWARENESS:
I know the main objective of you playing is to kill as many other players possible before they kill you. As commander, that role changes somewhat: You need to make sure you stay alive and have your teams kill as many other players as possible. In order to do this, the first thing you must do is find a GOOD hiding spot.
Once you have found your little shred of cover and concealment, it is then time for you to open up your commander’s screen and use the SCAN asset as often as possible. This will give you the real time intelligence that you need to give accurate orders, as well as, passing on intelligence to your men. Not to mention, you will have a better chance of seeing that OP-FOR personnel coming around to flank you. Personally, I have caught more than one stealthy player trying to get a bead on me and they would suddenly be surprised by a hand grenade going off in their face. Just because you know what is coming does not mean you are invincible: I have been killed by snipers and sometimes by the guy who was lucky enough to keep under my radar and kill me.
Bottom line: In order to keep yourself alive and be the best commander to your team, keep your eyes open and scan as often as possible. There is no greater way to assist your team other than staying alive. Just remember to stay as close as possible (providing cover, terrain, and/or concealment provide it) to your main staging area.
B). SITREP (SITUATIONAL REPORT):
Okay, you are commander now. You have found your little spot to hide and observe in. Now what do you do? Hopefully you are not answering this question “Rain artillery on the enemy’s non-cap point”! By assuming command, you should 1st zoom in on every spawn point on the map (Yours, OP-FOR’s, and the neutral ones). This will allow you to see what assets are available to you and, equally importantly, your enemy.
A good commander needs to know what he is up against in every situation. From knowing what is available you can prioritize every CP and start formulating a battle plan (DO NOT finalize the plan yet). That way you are able to orchestrate the battle so that your team mates can attempt to get you the double-points award at the end of the round.
If you want an advantage above other commanders, you may want to create a local server for every map out there. That way you can take screen shots of the CPs and print-off a file for every map as well as every map size. You can save yourself the time of zooming in during the actual battle and quickly familiarize the area of engagement while the map is loading.
A commander who knows where he is fighting has a much better chance of winning than if he knows just who he is fighting.
C). REVIEWING YOUR TROOPS:
You have your hide position, you have your SITREP, and you have just begun to formulate a plan that rivals those of the best West Point graduates of history. Oh, you did not consider who was spawning with what kit on your team? Time to learn to quickly adapt, overcome, and make do with what you have or else you will be too distraught to command. One of the best things the Army ever taught me was to make do with what I have. You may be on a server where no one spawned as medic or anti-tank. So as you are conceiving the plan try to encourage team members to squad up.
Once squads are formed, you will be able to tweak your plan once you can see what your squads are capable of. Just remember, you have assets available all over the battlefield to assist you in winning. You have areas where vehicles can be repaired. You can do supply drops and get your men more ammunition as well as healing area.
Now that you know what your team is composed of, you should be able to finalize your battle plan.
D). BRIEFING SQUADS:
You have your plan formulated, now to express it to your squads as quickly and as intelligibly as possible. For this, it is highly recommended that you use VoIP (You do not want to get too focused typing in your intent to squad leaders that you lose focus on the battle that is still going on around you!). Let them know that there is a method to your madness. If your squads can hear your plan and comprehend it, they will be able to execute the plan to the best of their ability and your chances of winning increase dramatically. You should give the Squad Leaders some leeway when issuing the orders, this way your Squad leaders can be of assistance to you and also feel some accomplishment as their own. As long as the objective is reached it should not matter in the least bit to you how it was obtained.
E). EXECUTION:
Orders are sent, squads comply, all hell breaks loose, and the chaotic beauty of battle fills your command screen. Once again, you are forced to keep up with the battle because your plan in some area or another has backfired and a squad, or possibly your whole team, is falling back trying to regroup and is vehemently requesting guidance from you.
There is a saying across the military: No plan has ever lasted more than five seconds after engaging the enemy. Always have at least 2 contingencies planned for the inevitable worse case scenario. A commander that panics will end up losing the battle.
You have to believe that, no matter what, you are in complete control of the battle. “Total Loss” should never appear in your vocabulary. You have to remain calm and cool. You cannot just start to drop artillery on areas at random. Do a scan as quick as possible. Assess the situation, see where you are being overrun and then redirect your team to the weakened areas in OP-FOR territory. This will force the OP-FOR to reassess their battle plan and keep you alive a little bit longer.
F). IMPROVISE:
Once you have executed your plan, sit back, watch and learn from your commander’s screen. You will be able to see what aspects of the plan worked, what did not, and be prepared to issue new orders to your squads. Drop them hints on where to spawn. Use your assets wisely. Let squads who are doing well know when Artillery, UAV, Supplies/Vehicle drops have become available. By “sharing” these assets with your squad leaders, it is more of reward system and it shows that you, as commander, are trying to contribute to their personal gains.
G). AAR (AFTER-ACTION REVIEW):
If you plan on commanding on a regular basis, there is no greater tool out there than remembering your own mistakes and learning from them. If possible, use the battle recorder so you can see where you made your mistakes, as well as, where you excelled. Remember, every battle will be different. There is always the human variable for chaos in it that will always show you a new approach.
FOR CLANS: You would be wise to do this, for you have ways outside of the game to communicate to your clan-mates on the pros- and cons- of each battle, making your clan a more formidable force.
III. Commander’s Discretion:
As commander you have a certain duty to your team to uphold. The team is counting on you to assist them in winning. Sometimes, in order to get that win, you have to make sacrifices. The order of sacrifices should go as follows -
• 1st: Lone wolves – As commander you need to take care of your team, Lone Wolves do not play as a team, and they cannot take orders from you. They are the most expendable parts of the team.
• 2nd: Disobedient squads – If squads do not want to follow your orders, then cut them away. You need your team mates to act as an actual team and not run around like a pack of immature wolves. Cut away infected groups of individualism if they cannot function as a team.
• 3rd: Loyal squads – This is one of the hardest things to do, these are your bread and butter winners, the ones winning you most of your points. Sometimes they will need to be sacrificed to allow your vigilance to prevail. It is better to sacrifice a squad then yourself. If it is a close match, you cannot afford the 15 second loss of command that comes with each death.
After making these sacrifices, there comes a new group of items that come before you in the sacrificial list: Your command assets –
• 1st: UAV – The UAV is a great tool, because it gives you a constant intelligence of activity in a sector, but figuring the scan shows the entire battlefield as well as recharges faster, it is a much more useful asset.
• 2nd: Artillery – Artillery is great at taking out OP-FOR, but sacrificing offensive assets over intelligence assets makes more sense. You can order a squad to repair the damaged artillery, and still maintain observation of the OP-FOR to track enemy movements and keeping the intelligence flowing to your teammates.
• 3rd: Scan Satellite – This is your 2nd most valuable asset. Keep it up running as much as possible (but do not risk yourself to keep it up). IF it happens to go down, that should be your 1st priority to repair. Let your squads know that you will be off-line trying to repair it. If you have any assets left, use them to recon or clear the area of OP-FOR.
Remember, you acting as commander, need to keep yourself alive so that you can keep your team posted. And assist them in ways as YOU SEE FIT! You are the commander, if others have a problem with it they should command. Remember you are the coach in this, not the all-star.
Finally, remember you need to have fun while doing this. There is no sense in VOLUNTEERING for the position if you do not enjoy the role of strategist. Voluntarily becoming commander is your discretion, no one forced you to do so.
IV. Conclusion:
Commander is fun, but it is not easy. Hopefully, this guide has helped both “newbies” and the most experienced commanders out there. It is all about having fun!
LMAO, now if we can only get Skippy to do a list for BF2 life will be good
http://www.skippyslist.com/skippylist.html
http://www.skippyslist.com/skippylist.html
Currently half-way through with my next tut. It is on commanding, hopefully it will be of some assitance to you all! keep the feedback coming, should start on my 3rd tut "Squad-Leading" in early July. Also, I am putting together a nice .PDF files for those who love to command! More to come
-"Dakota2x"
-"Dakota2x"
Too much time too little shooting good job +1!
Dude.... Dude... Dude... I am so scarred for life nowtF-voodoochild wrote:
Hehe, all I could think about while watching that video was this flash movie
I love AF and SF. As for EF, I have it but I can never find any servers for it.... But as far AF and SF go, they rock! I would love to see EA come out with a patch to make the initial BF2 maps available for SF and vice-versa.
If your a commander, your ass should be on the ground and not in a pilots seat. If you are trying to do both then it is no wonder you constantly lost. Do one or the other, please do not complain if you lose while trying to do both. When you do that it sounds like you were guilty of trying to statpad yourself and cannot blame the [22] if they did it better. No offense dude, I know it sucks, but sometimes you have to adapt and overcome, if you can't on that server find one you canSomeguy wrote:
not when you cant fly, or spawn at any flag for the hilo or jet, and i wanted to fly to get my medal.
What I have seen for veteran awards (as well as expert) you have get the minimum requirements in one round then the next round you play you have to achieve IAR requirements. I do not know if that is a glitch or not but that is how it was that I got my Expert Pistol I got over 40 kills with a pistol IAR and 480 kills with it prior to the start of that round. At the end of that round I was well over the 500 total kills and met the 18 kills IAR requirements. The following round I scored 19 kills with a pistol and then it showed up, saying that I was awarded the badge.
I don't know if this helped you or not. I do know, however, how upsetting it can be to meet the requirements and not get the award! (Unless of course it is the "Enemy Marksmanship Badge" err... Purple Heart rather)
I don't know if this helped you or not. I do know, however, how upsetting it can be to meet the requirements and not get the award! (Unless of course it is the "Enemy Marksmanship Badge" err... Purple Heart rather)
I wish that were the case, but at my job I sit behind a computer monitor for 8 hours a day with nothing to do. I am a security guard, so I actually get paid for this in a round about way LOL.Hit_Sqd_BaKed wrote:
I personally think you need more of a life if you have that much time to waste on making a post!!
God I love America!
Well gang, thank you for great support and feedback on this. I REALLY APPRECIATE IT!!! You have helped transfer from BETA to Version 1.0 . Don't stop now, the more feedback the better this manual becomes for all!
If you look again I had a whole section on scanning. As for spotting, I have noticed when I am in a squad on my map nothing shows when a commander calls it. Otherwise I would have devoted a section to it.Kenthar wrote:
I find some of the commander advice questionable, to be honest. You never even mentioned scan+spotting.
But thank you for the criticism!
I will take it into consideration when I write my guide for commanders
I understand where you are going with the medic, but here is my reasoning NOT to do it. You, as commander, have the responsibility to your team. I try to keep myself as an Engineer, just because I can keep my assets up and running and supporting my team that way. If you are spending your time running around the map trying to keep everyone alive, then you are not doing your job as commander. You become to focused on saving the injured not seeing what is going across the battlefield. You have a better chance being killed that way. And from personal experience, those 15 seconds could cost you an entire squad or worse the whole battle.SASnic wrote:
the comander should mostly play as medic, in my opinion, because he can see where all the casualtys are and have a better understanding of where the enemy is.
thanks for the guide tho
It is more important that every full squad have at least one medic. You can really make a difference that way!
But THANK YOU very much for your opinion!
As much of a smack-tard as Saddam was while he was in power. We (The US) went and liberated the most liberal nation in the middle east.... Oh well we are committed nowshspunkrockr wrote:
Republican gets elected: terrorist attacks in the US increase due to an overcompassionate political party that can't get their fucking facts straight . . . and the war in Iraq is a right one. People only focus on Bush "Oh, Saddam never harmed us" yes he fucking did. People don't look at Saddams past. He murdered his predicessor to get into power. Started countless wars. Killed millions of his own people by carelessly throwing WMDs at the Iranians . . . I could go on for days.
Alright. You all can take this with a grain of salt. Without exposing anything that is vital to US National Security (Not worried about foreign relations here). I will expose what little I can about the war in Iraq seeing how I was there working intelligence for almost a year.
1) Yes. Iraq did have chemical weapons. Not nearly to the extent that they had back in 1991. They used over 80% in the kurdish genocide.
2) Iraq did not have ties to Al-Qaedia under the Saddam Regime. Feydaheen's main purpose was to expose and kill terrorists like the Ghestappo did during WWII when it came to Jews. Al-Qaedia started to infilitrate into Iraq around June 2003 shortly after Al-Jahzereera initially claimed we caught Saddam.
I cannot give you any links to this, so you can take it or leave it. But those are the facts I saw with my own two eyes while I was in Baghdad.
4 more comments and it will be out of BETA. I appreciate all of you for your compliments!
Dude, well done. If I catch you on BF2, I will follow your orders to Virtual Hell and back!
Depending on how this goes, I will be posting a guide for commanders on here. Thanks for the time reading it.
-Dakota2x
-Dakota2x
Battlefield 2 Guide for Winning Teams (Version: 1.0):
By Dakota2x
I. Introduction
II. Team Composition
III. Commanders
IV. Squad Leaders
V. Squad Members
VI. Lone Wolfs
VII. Final Thoughts
I. Introduction:
This is a common sense guide to help develop excellent teamwork skills in order to have a better win streak and grant your team’s rating the best as possibly achievable. Please bear with me, for this is my first attempt at writing a guide.
I will work through this in reverse order, so that you know what your leaders should be doing, and if they are not complying with this you cannot hunt them down and kill them, but you may POLITELY SUGGEST that they make some changes to their current operation and refer them to where you read this guide.
II. Team Composition:
Ideally when forming a team, this would be your most tactically
Strategic formation (using a 15 man team, which I often find on most 64 size servers I play on):
- Commander: Medic, Engineer or Support
- Alpha Squad: (4 men)
i. Squad Leader: Medic, Support or Special Forces
ii. Squad members: 1x assault, 1x sniper, & 1 support kit (varying from the commander’s kit)
- Bravo Squad: (4 men)
i. Squad Leader: Sniper, Medic, or Engineer
ii. Squad Members: 2x Support, 1x Anti-Tank
- Charlie Squad: (3 men)
i. Squad Leader: Medic or Support
ii. Squad Members: 2x Assault Kits (Sniper, Special Forces, Assault, or Anti-Tank)
- Delta Squad: (3 men) – Use any kit but keep the squad for available for piloting aircraft.
III. Commanders:
This section is for commanding your troops and effectively controlling the field of battle. NOTE: It is best for a commander to use one of the 3 support kits while playing (Medic, Support, or Engineer) so that he can further assist his team instead of constantly waiting on supplies.
- Intelligence:
TAKE TIME TO KNOW YOUR AREA OF RESPONSIBILITY!!!! As commander, you need to know basically where everything is from stationary weaponry to OP-FOR Commander’s assets to Vehicle spawn points, and potential choke points. If you know the area you are commanding in you can direct your team more effectively and spend less time trying to re-spawn. General map images are available at Planetbattlefield.com. Also, you can get familiar with central areas in the single player version of the game, as well.
- Assets:
Currently there are 5 tools exclusive to the commander and can be found on the right side of the command screen. (The command screen can be entered by hitting the “Caps Lock” button). The five assets are as follows: SCAN, ARTILLERY, UAV, SUPPLIES, and VEHICLE DROP. Each of the 5 listed above will be discussed individually below.
- SCAN: The scan is critical for complete battlefield situational awareness. When used in conjunction with the ZOOM feature of the command facts, you can pass down OP-FOR threats to your team mates. Also, it frees up the UAV for squad leaders who feel threatened or need constant OP-FOR progression updates. Another benefit of the scan is that, unlike the UAV, it is not detected by OP-FOR. Also, it is best to use the SCAN for placing ARTILLERY most of the time people see a UAV flying overhead they will think “Oh Shit… Incoming… Need to find cover”. If the OP-FOR does not see the UAV, then they will not be prepared for the “Steel Rain”.
Another benefit is that SCAN recharges the fastest of the 5 commander assets. For example you can generally get 2 scans off before in between artillery attacks, so you have a better idea of enemy troop movement.
- UAV: The UAV is a beautiful asset, you can use it to see how well certain squads are handling combat, see whether or not it is safe to drop supplies or vehicles to support your team, or whether you are about to rain artillery down on the enemy.
The only drawback to the UAV is that it can be seen by OP-FOR, and if seen they can shoot it down. I have shot down multiple UAVs when in mobile AA vehicles. (See above under “SCAN” for further details.) You can spot a UAV in the sky (in case you did not know, “Blue” is your team’s UAV and “Red” is OP-FOR’s UAV).
If one of your Squad Leader’s request a UAV (this will appear as a yellow UAV mark on the map in the commander’s screen) do not grant it right away. If there is a scan available go ahead and use that first. If it is just a sniper picking off the Squad Leader’s team one by one, just spot it for him and tell him to re-request the UAV after a 20 seconds or so if the problem is still present or the situation has deteriorated further,
- SUPPLIES: Re-supply is a crucial asset to any team, especially during Flag Captures. Personally there have been times when I would be taking a flag while in a fire-fight and run dry on ammo, and no support troops were around, and I would die and OP-FOR would defend or regain control of the point. So it is on you, Commander, to insure that is not case for your team’s survival. Also, when placing supply drops, make sure it does not draw attention to your snipers, the last thing you want is to be blamed for drawing attention to an over-watch position and your only security is killed.
On the same note, you can use supply drops to your advantage: You can place a supply drop roughly 50 to 75 meters away from a sniper/assault position and just watch the enemy go in and try to use it as you just gave your team a new kill zone. (In a real world situation, I would probably shoot a commander for doing something like that, but then, thank God for video games).
You can use the SUPPLIES to repair your UAV Trailer, SCAN radar dish, and ARTILLERY guns. But be warned, if there is an OP-FOR special forces kit back there, he can re-supply himself with C-4 and take out the assets he could not with his initial load.
- VEHICLE DROP: A fairly new asset (as of patch 1.3) for commanders is the VEHICLE DROP, it will provide (generally) a quick transport for most squads. DO NOT USE THIS ASSET TO KILL OP-FOR!!! As of now, that has become one of my greatest pet peeves while playing. Realistically, you would not drop vehicles so close to an enemy. Use it to provide a fast assault or retreat for squads, not to try to look funny as you kill one OP-FOR soldier (which you do not get credit for) by dropping it on him.
Use this sparingly! You do not want everyone driving around in a vehicle without having at least one gunner (Of course, there are exceptions to this).
- ARTILLERY: Now we come to one of my most favorite “toys” on the commander’s screen: ARTILLERY. Indirect fire serves multiple purposes: It can be a great diversion to push OP-FOR into a choke-point/kill zone, it can defend a check point when there is no allies close by, and of course, it can be used to take out the enemy. There is a downside: ARTILLERY will kill OP-FOR and teammates alike, without prejudice.
For use as a diversion, you will want to place the ARTILLERY at a central location between your established kill zone and an OP-FOR control point. That way the OP-FOR will either press forward into your kill zone or fall back to their CP in order to regroup. NOTE: Commanders, for this situation you will want at least 2 squads of 3 to do this. Squad 1 to cover the kill zone and Squad 2 to “rush and engage” against the retreating enemy, while (here is the tricky part) avoiding the incoming ARTILLERY.
Commander, have you ever got upset that some little OP-FOR somehow got under your radar and started taking over a CP and none of your teammates are close by and you yourself are at the other end of the map? Don’t get mad, get even! ARTILLERY is not just for offense. Drop it on that poor SOB who thought he was smarter than you. And as soon as the smoke clears, make sure that you have at least 1 squad en route to recapture the CP. The less CPs the OP-FOR possess, the more predictable (or more frenzied, depending on your point of view) they become.
Finally, we come to the task that we all love best: Killing the enemy! There is nothing better than seeing an enemy squad disappear off the map due to “Steel Rain”. When you use assets in combination such as SCAN or UAV with ARTILLERY, you become a momentary God of War. I have seen whole squads decimated by one volley of ARTILLERY, it is yours to unleash.
A final note regarding ARTILLERY for Squad Leaders, Squad Members, and Lone Wolves: I cannot stress this enough, IF YOU SEE IN YOUR MINI-MAP THAT YOU ARE WITH IN A RED PULSING CIRCLE WITH A GUN ICON IN IT AND HEARD OR READ ON YOUR SCREEN “SHOT OVER”, GET THE HELL OUT OF THE AREA… Your commander is not responsible for the TK if you are not smart enough to get out of the area before impact.
- Battle Orchestration:
As commander, you need to picture yourself as a conductor of an orchestra, perfect timing and proper execution will get you a standing ovation while anything less will ruin your appeal (and probably will not get you re-elected for command again in the next round). Here are some real-world strategies that I found that work really well in the game:
- Bound and Cover: For this tactic, you need 2 squads. It is an assault plan to take out heavily fortified OP-FOR defensive positions. Alpha and Bravo will start at CP I and need to take CP II. Alpha will begin a movement to contact while Bravo will provide security during Alpha’s movement. When Alpha makes initial, visual contact with OP-FOR they will take defensive positions to provide security for Bravo’s movement towards CP II. Bravo will pass Alpha’s position and engage the OP-FOR. Alpha will move to support Bravo’s capture of CP II. Objective reached, await new instructions.
- Flanking: This tactic is older than Sun Tzu’s Art of War, but it is still a worthwhile and it WORKS!! For this example there will be 3 squads involved. Alpha will begin at CP I, Bravo and Charlie will both start at CP II, with the objective Enemy destruction at CP III. Charlie will initiate movement towards CP III due south of CP II. Alpha will precede southeast from CP I to CP III. Bravo to provide security for Charlie’s initial movement south. As Charlie begins to engage the enemy to the south, Alpha will engage from the west and Bravo will move south to take CP III.
- Creating Choke Points: This tactic works wonders at the beginning of a round (especially in “Head-On” maps/missions) and is best if preformed with vehicles. For this situation, Alpha will have an M-1, as well as 3 men in a HMMWV, Bravo will have a DPV, a LAV-25, and Charlie will provide air support with an AH-1Z. Charlie will head to OP-FOR base and take out the bridge. Alpha and Bravo’s fast movers (DPV and HMMWV) will capture CP I and II while Alpha and Bravo’s Armor go in and support Charlie at the bridge.
Remember, this list is by no means all-encompassing, but hopefully it will be enough for you to realize how much “smoother” war goes when your teams act like teams and not like a bunch of individual monkeys with guns.
- Do’s & Don’ts for Commanders:
Here is a list of things as commander you should remember:
- Do listen to your Squad Leaders and encourage them to make requests (reasonable ones).
- Do SCANs as often as possible. This way you will have real time battle analysis and you can change your strategies accordingly.
- Do issue sensible orders. Your Squad Leaders are your arms and eyes of the battlefield. Keep them happy and they will earn you points.
- Do have fun while playing
… And now for the “Don’ts”:
- Do not fly. A commander’s place is on the ground, not in the air. If you are Chuck Yeager, then your place is in the Air supporting your commander. You cannot fly and focus on the battle.
- Do not spend more time shooting at enemies then you do watching your command screen. When commander, your command screen should be your best friend.
- Do not get yourself killed frequently; you have a responsibility to your team to stay alive (especially if you want double points at the end of the round!).
- DO NOT DROP VEHICLES ON OP-FOR!!! I cannot reiterate that point enough, but it will be the last time in this manual.
IV. Squad Leaders:
So you decided to be a Squad Leader? If the commander is the God of the battle, then the Squad Leader would be his Avatars. You are the one who will relay the orders of the commander to your men, and in turn, your men will send you requests for vehicles, supplies and even artillery that you will need to pass up to the commander.
- Dual Roles:
As touched upon in the introduction, you are the one who makes the commander’s intent into manifested victory. He will provide you with all the information possible to get that goal accomplished, but you and your squad are the ones that will actually get it done.
- 1st Role: You have an obligation to keep your squad intact and yourself alive to act as a spawn point. It does your squad and your team no good if you die and your squad re-spawns in four different corners of the map. So that means no thinking you are “Rambo”, you have to use your head more than you pull the trigger. Your ingenuity and creativity are your best weapons; and if properly used more powerful than an air strike.
- 2nd Role: You are the commander’s champion. You are to fight his battles for the good of the team. He will assist you as best he can, and by completing his objectives, you will be returning the favor. Keep in contact with him and tell him what you need as well as what is going on around you.
- Ground Pounding Commanders:
Your primary mission is to take the battle to the OP-FOR as the commander sees fit. You will be in charge of a small team responsible for the orders of the commander to be followed. You must work with your squad and other squad leaders to make sure your team wins. Also, you will be the command unit that is on the front going toe-to-toe with the enemy. Communications is a must! You need to stay focused on your objective, but keep an eye/ear open to what is going on around you so that you do not enter the proverbial “mine field”. So follow your orders and use your squad as an asset to not only your commander, but to other squads as well.
- Do’s & Don’ts of Squad Leading:
Once again, here is a list of things to do and not to do:
- Do listen to your commander. He is the one that sees the whole picture of what is going on, not just your AOR (area of responsibility).
- Do COMMUNICATE with your squad members. They will help you make the commander’s intent the victory that you deserve.
- Do keep your squad happy. A happy squad will be more willing to follow you (especially if they are alive) then they will be to if they are pissed off because you keep getting them killed.
.... And yet again, the don’ts:
- Do not go off and do your own thing. There is nothing more upsetting to your squad members who are looking for direction and your commander who is giving you direction to be off playing “Rambo”.
- Do not keep your commander in the dark. He can be your guiding light in the fog of war. He cannot help you though if you don’t talk to him.
V. Squad Members:
You may think that by playing as a Squad Member that you are a mere pawn and that it is not worth your time, but I have seen pawns put kings in checkmate and win the game. Your role is simple: The combatant. Whether you are a support-class or an assault-class kit, you are the bread winners and, if done properly, you are the ones with the most points at the end of the match.
Squad members have the fewest restrictions and the most options available to them. Your job is easiest: stay alive and win.
For Squad Members, there will be no “Do or Don’t” list, just only to be finished with these 2 things: Listen to your Squad Leader and do not do your own thing, you joined the squad of your free will.
VI. Lone Wolves:
Lone Wolves should be reserved for only the most experienced players, they are not involved in the commander’s plan, have no communications with the commander other than the “Q” button commo-rose (VoIP is not available to Lone Wolves). So unless you are an awesome player, or an angry-at-the-world teenager, you should team-up. But if you are a Lone Wolf that cannot hold your own, and get upset at dying on a regular basis, perhaps you should reconsider your position.
VII. Final Thoughts:
So here we are at last, the final section of this guide. I will leave with these last few points, which I believe to be common sense.
* Follow the rules of the server you are on, even if there is no Admin present. It is called “Integrity”. If you don’t follow the rules it is called “Being A Smack-tard”.
* Team up. It will help you in the long run.
* Communication + Teamwork = Winning Combination. Enough said.
* HAVE FUN. That is what the game is about. If you are not having fun, then go do something else you like.
- Positive and Negative feedback always welcome at [email protected]. Just remember, be polite and be gentle… This was my first time.